
Key Lime Pie Bars
Have you ever found yourself dreaming of sunshine and ocean breezes, only to realize it’s chilly outside? Well, say hello to your new best friend: Key Lime Pie Bars! These delectable treats encapsulate the zesty tang of key limes combined with a buttery graham cracker crust that will have your taste buds dancing with joy. Imagine sinking your teeth into a creamy, luscious filling that’s bursting with flavor, topped with a dollop of whipped cream. It’s an irresistible dessert that’s easy to make, making it perfect for family gatherings, potlucks, or just a cozy night in.
Fun fact: Did you know Key Lime Pie’s origins can be traced back to the Florida Keys, where it’s been savored for over a century? These bars might just be the simplistically elegant alternative that your family raves about—almost as adored as my famous chocolate chip cookies! Let’s dive into this recipe and bring a slice of that tropical vibe right into your kitchen.
What is Key Lime Pie Bars?
So, you might be wondering, “What exactly sets apart Key Lime Pie Bars from the traditional pie?” Well, for starters, it’s all about convenience. They’re basically a simplified version, featuring the same tangy goodness but now in bar form! Imagine serving a delicious treat that can be cut into neat squares, making it easier to share at those family gatherings. And let’s be real—what could be more inviting than grabbing one of these vibrant green bars and enjoying that burst of key lime flavor? After all, the way to a man’s heart is through his stomach! So, grab those baking tools and get ready to impress your loved ones with these delightful bars.
Why You’ll Love This Key Lime Pie Bars
There are countless reasons to whip up a batch of Key Lime Pie Bars, and let me share three that stand out. First, the main dish highlight is the flawless balance of sweet and tart flavors that dance across your palate with every bite. It’s a delightfully refreshing dessert that can brighten even the dullest winter evenings. Second, making these bars at home is a budget-friendly alternative to purchasing desserts from the store. Plus, nothing beats a homemade treat! Lastly, when topped with whipped cream and zesty lime wedges, you take the experience to another level of deliciousness.
If you’ve ever enjoyed a traditional Key Lime Pie, these bars are like its fun little cousin, bringing joy in every slice. So why not give this recipe a try? Your taste buds will thank you!
How to Make Key Lime Pie Bars
Quick Overview
Making Key Lime Pie Bars is not only easy but utterly satisfying! You’ll experience a delightful crunch from the crust paired with a creamy filling that melts in your mouth. The best part? The total preparation time is roughly 25 minutes, with an added chill time to let those flavors meld beautifully.
Ingredients
- 1 1/2 cups graham cracker crumbs
- 1/3 cup sugar
- 1/2 cup butter, melted
- 2 cans (14 ounces each) sweetened condensed milk
- 3/4 cup key lime juice
- 4 large egg yolks
- 1/4 teaspoon salt
- Whipped cream for serving
- Lime wedges for garnish
Preparation Notes: Ensure your key lime juice is fresh for optimal flavor, and keep your ingredients at room temperature for smooth mixing.
Step-by-Step Instructions
- Preheat the Oven: Set your oven to 350°F (175°C) to get it ready while you prepare your bars.
- Mix the Crust: In a bowl, combine graham cracker crumbs, sugar, and melted butter. Stir until the mixture resembles wet sand.
- Press the Crust: Firmly press the crumb mixture into the bottom of a greased 9×9 inch baking pan. Bake the crust for about 10 minutes until lightly browned.
- Prepare the Filling: In a mixing bowl, whisk together the sweetened condensed milk, key lime juice, egg yolks, and salt until well combined.
- Pour and Bake: Pour the filling over the baked crust and return it to the oven. Bake for an additional 15-18 minutes until set.
- Cool: Let the bars cool to room temperature, then refrigerate for at least 3 hours before cutting into squares.
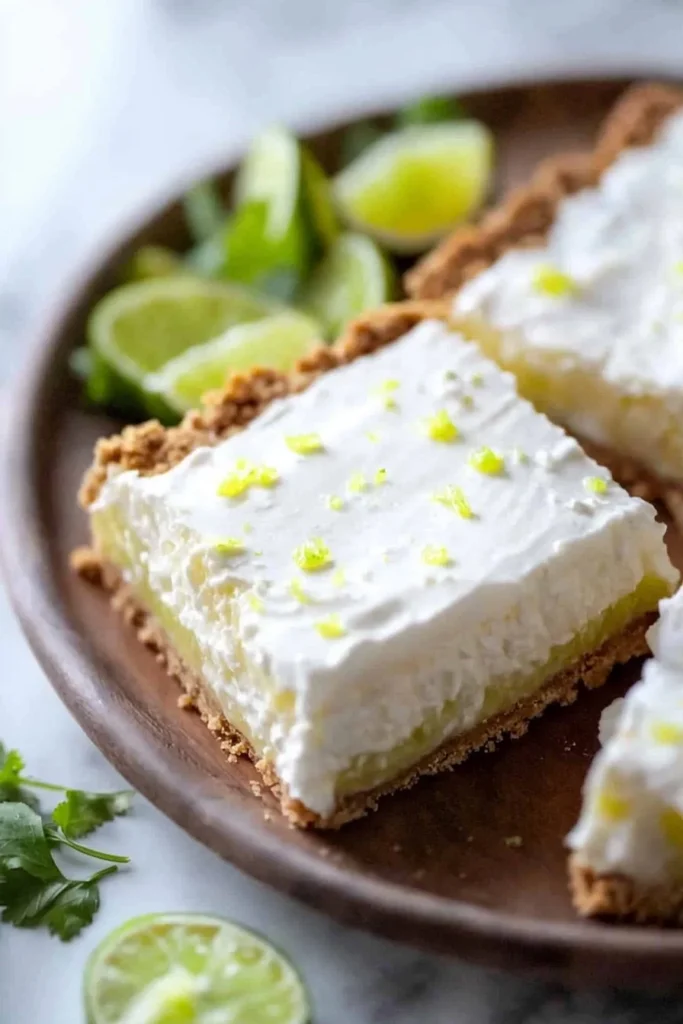
- Serve: Top each bar with whipped cream and garnish with lime wedges before serving.
Top Tips for Perfecting Key Lime Pie Bars
- Substitutions: If you want to mix things up, consider using digestive biscuits instead of graham crackers for a slightly different flavor.
- Timing: Ensure your filling is fully set; a gentle jiggle is just fine, but it shouldn’t be liquidy.
- Avoid Common Mistakes: Be cautious not to over-bake the filling. It should be set but still creamy.
Storing and Reheating Tips
To store your Key Lime Pie Bars, simply cover them tightly with plastic wrap or transfer them to an airtight container. These bars can be refrigerated for up to 5 days. If you want to make them ahead of time, they freeze beautifully! Just cut them into squares before freezing, and they should keep for up to 2 months. To reheat, allow them to sit at room temperature for about 30 minutes—the refreshing flavors will be just as vibrant as when you made them!
Remember, delicious can be quick and easy. So grab those key limes and start baking your way to a tropical paradise with these delightful Key Lime Pie Bars. Enjoy every bite!

Key Lime Pie Bars
Ingredients
Method
- Preheat the oven to 350°F (175°C).
- In a bowl, combine graham cracker crumbs, sugar, and melted butter. Stir until the mixture resembles wet sand.
- Firmly press the crumb mixture into the bottom of a greased 9x9 inch baking pan. Bake the crust for about 10 minutes until lightly browned.
- In a mixing bowl, whisk together the sweetened condensed milk, key lime juice, egg yolks, and salt until well combined.
- Pour the filling over the baked crust and return to the oven. Bake for an additional 15-18 minutes until set.
- Let the bars cool to room temperature, then refrigerate for at least 3 hours before cutting into squares.
- Top each bar with whipped cream and garnish with lime wedges before serving.
Leave a Reply