
The Best Cherry Pie Recipe
There’s something magical about biting into a slice of warm cherry pie. The flaky crust meets the luscious, slightly tart filling, creating a delightful harmony of flavors that dances on your palate. If you’ve ever tried to recreate this classic dessert, you’ll know it can be both simple and rewarding. I remember the first time my grandma showed me how to make her famous cherry pie. We turned it into a family gathering, competing over who could make the best crust. Each year, it became an anticipated highlight, filling our home with the sweet aroma of fresh cherries baking in the oven.
What makes this recipe special is its straightforwardness, using ingredients you likely have on hand. Compared to my other popular recipe for classic apple pie, this cherry version brings that added zing with every bite! Whether it’s winter evenings or casual family gatherings, the comfort food aspect of this delicious dessert is sure to please everyone. So, roll up those sleeves, and get ready to indulge with this cherry-filled delight!
What is The Best Cherry Pie Recipe?
Ah, The Best Cherry Pie Recipe! Why the best, you may ask? The name comes from my passionate quest to find a pie that embodies that perfect sweet-and-tart balance, satisfying both my sweet tooth and those of my loved ones. It’s a little bit like asking why the sky is blue or why we humans can’t resist dessert! As they say, “the way to a man’s heart is through his stomach,” and I’ve found that this pie is an excellent path! If cherries could talk, I imagine they’d sing praises too! This pie is perfect for sharing and, believe me, every forkful will spark joy. So why not grab those cherries and let’s make it together?
Why You’ll Love This The Best Cherry Pie Recipe
First off, the main highlight of The Best Cherry Pie Recipe is its unbelievable flavor combination. The bright taste of cherries paired with a buttery, flaky crust is simply irresistible. Have you ever felt the satisfaction of creating your own dessert at home? Cooking at home not only saves you money but enables you to customize it to your liking!
Additionally, let’s not forget about those delightful toppings! A sprinkle of powdered sugar dust, a dollop of whipped cream, or even a scoop of vanilla ice cream—each elevates the experience to another level, adding creaminess and texture to that tart cherry filling. If you’re a fan of pies, this cherry one stands out like a bright red cherry on top of a sundae when compared to other popular desserts. So why wait? Let’s dive into this delicious adventure together!
How to Make The Best Cherry Pie Recipe
Quick Overview
The Best Cherry Pie Recipe is not just easy to prepare; it’s satisfying and comforting with every bite. You’ll experience that delightful contrast between the crunchy crust and smooth, fruity filling. Preparing this pie takes merely 15 minutes, with a baking time of about 45 minutes, giving you a delicious home-baked dessert in less than an hour!
Ingredients:
- 2 cups fresh or frozen cherries
- 1 cup granulated sugar
- 2 tablespoons cornstarch
- 1 tablespoon lemon juice
- 1 teaspoon vanilla extract
- 1/4 teaspoon almond extract
- 1 tablespoon butter
- 1 pie crust (store-bought or homemade)
- 1 egg (for egg wash, optional)
Step-by-Step Instructions
- Prepare Your Oven: Preheat your oven to 425°F (220°C).
- Make the Cherry Filling: In a medium mixing bowl, combine the cherries, granulated sugar, cornstarch, lemon juice, vanilla extract, and almond extract. Stir the mixture gently, ensuring that the cherries are evenly coated.
- Prepare the Crust: If you’re using a store-bought pie crust, lay the first crust into a 9-inch pie plate. You can also make your own pie crust for a more homemade touch.
- Add the Filling: Pour the cherry mixture into the crust, spreading it evenly. Dot the top with small pieces of butter.
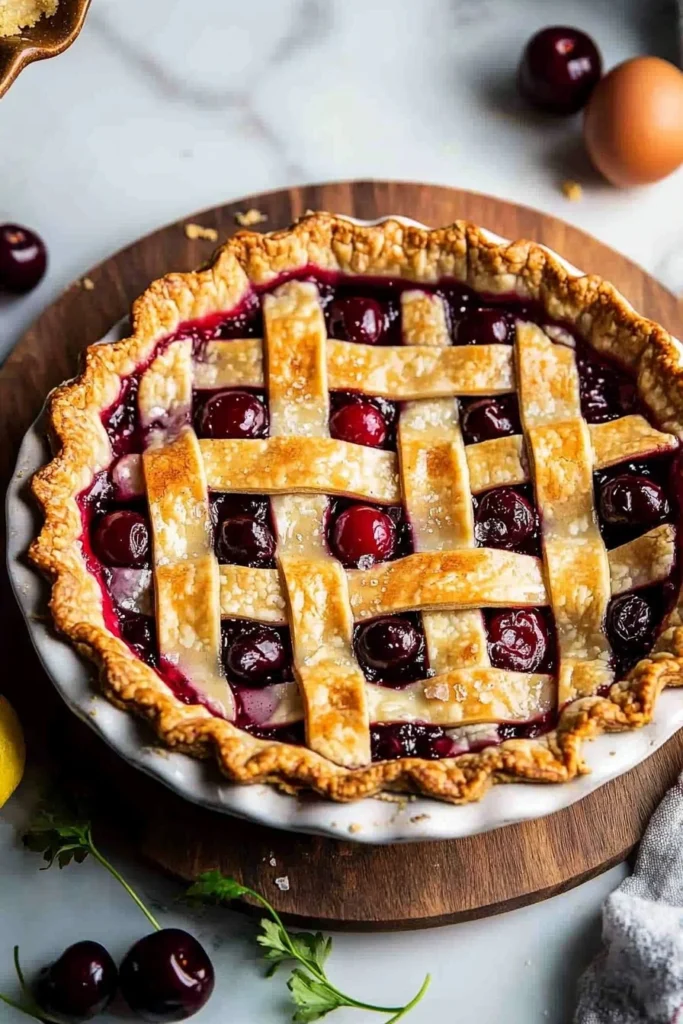
- Cover with the Second Crust: If using a second crust, place it on top of the cherry filling. You can create a lattice crust for a beautiful design, or simply seal the edges with your fingers. Cut a few slits in the top crust to allow steam to escape.
- Egg Wash (Optional): Beat the egg in a small bowl and brush it over the top crust for a golden finish.
- Bake: Place the pie in the oven and bake for about 45 minutes or until the crust is golden brown and the filling is bubbling.
- Cool and Serve: Allow the pie to cool for at least 30 minutes before serving. It’s delicious warm or at room temperature!
Top Tips for Perfecting The Best Cherry Pie Recipe
- Substitutions: If fresh cherries aren’t available, frozen cherries work just as well! Just be sure to thaw them and drain excess juices before using.
- Timing: Make sure to adjust the baking time if you’re using a deeper dish as it may need a little longer to cook through.
- Avoiding Mistakes: To prevent a soggy bottom, make sure your pie crust is prepped properly. If using a homemade crust, chill it before adding the filling.
Storing and Reheating Tips
Leftover pie? Store it covered in the refrigerator for up to 5 days. You can also freeze the unbaked pie for up to 3 months. When you’re ready to enjoy it, simply bake from frozen by adding an additional 10-15 minutes to the baking time.
To reheat, slice a piece and warm it in the microwave or oven until heated through. A warm slice of cherry pie is an unbeatable treat, and although it may not last long, every bite will be worth it!

With this easy and delicious recipe for The Best Cherry Pie, you can impress friends and family alike. Its vibrant colors and delightful flavor make it a perfect choice for any occasion. Not only will it become a staple in your kitchen, but it will also create memories that last a lifetime. So, grab those cherries, and let’s get baking! Who’s ready for some fresh pie?
Cherry Pie
Ingredients
Method
- Preheat your oven to 425°F (220°C).
- In a medium mixing bowl, combine the cherries, granulated sugar, cornstarch, lemon juice, vanilla extract, and almond extract. Stir gently until cherries are evenly coated.
- If using a store-bought pie crust, lay the first crust into a 9-inch pie plate.
- Pour the cherry mixture into the crust, spreading it evenly. Dot the top with small pieces of butter.
- If using a second crust, place it on top of the cherry filling. Cut a few slits in the top crust to allow steam to escape.
- Beat the egg in a small bowl and brush it over the top crust for a golden finish.
- Place the pie in the oven and bake for about 45 minutes or until the crust is golden brown and the filling is bubbling.
- Allow the pie to cool for at least 30 minutes before serving. It’s delicious warm or at room temperature.
Leave a Reply