
There’s something magical about a piece of Old Fashioned Fudge that takes you back to your childhood. Its rich, creamy texture and decadent taste make it a beloved treat for all ages. Remember the last time you indulged in a bite of fudge that just melted in your mouth? It’s that experience we’re aiming to recreate here! Fun fact: fudge is said to have oriated in the United States in the late 19th century, and it quickly became a popular sweet for candy makers everywhere. Not only is this recipe simple to whip up, but it also brings the family together, making it a perfect weekend project. So, if you’ve enjoyed a delightful Chocolate Chip Cookie recipe from our blog, you’ll love making this Old Fashioned Fudge. Get your saucepan ready for a delicious dessert that’s sure to impress!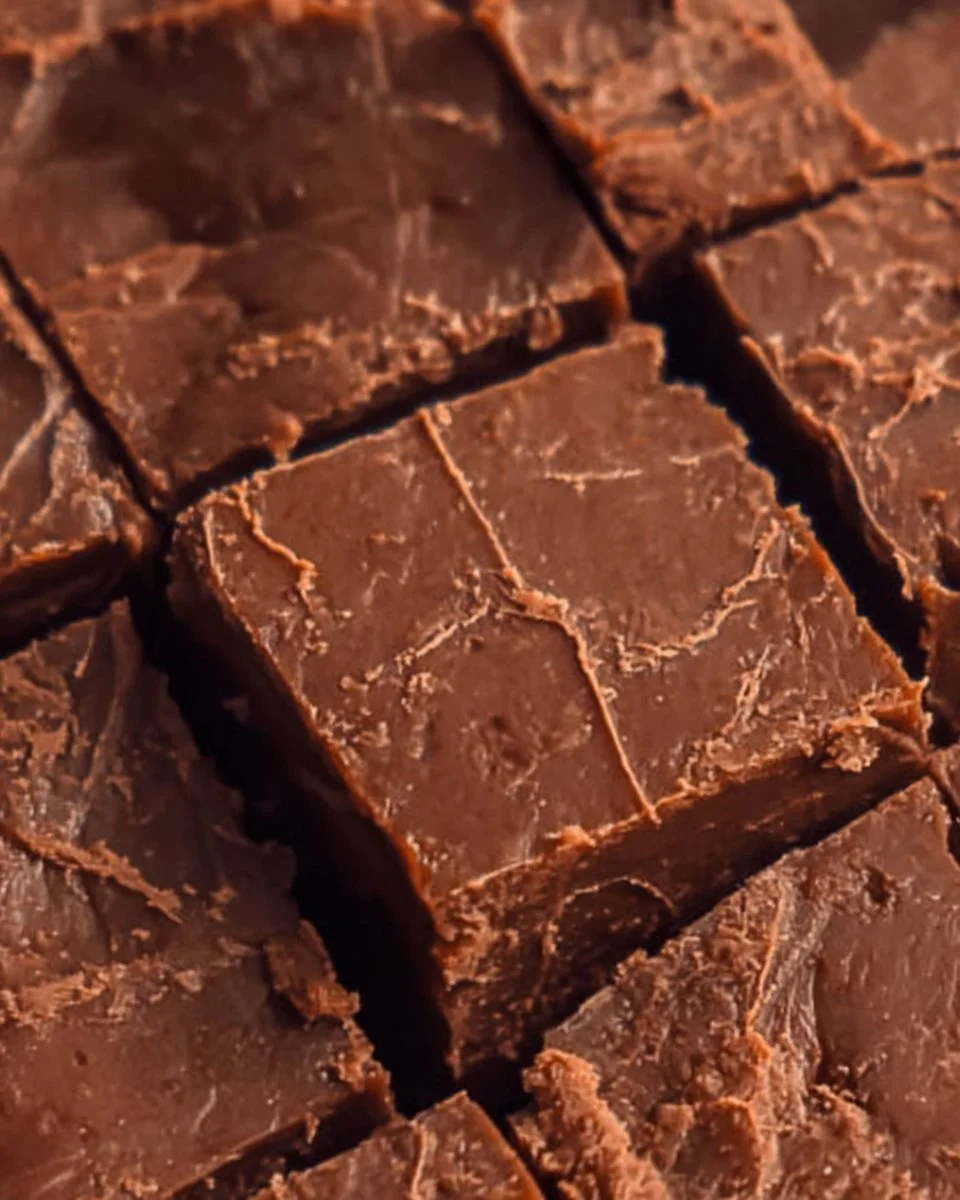
What is Old Fashioned Fudge?
Now, you might be wondering, why is it called Old Fashioned Fudge? Well, let’s dig into that! The term “old-fashioned” brings to mind images of classic diners and charming candy shops, doesn’t it? It’s that nostalgic feeling we all love. The name speaks to its timeless appeal—this isn’t just any fudge, it’s the kind your grandparents would make; a truly comforting dessert that warms the heart. It’s said, “the way to a man’s heart is through his stomach,” and this fudge might just land a few hearts! So, let’s roll up our sleeves and dive into this delightful recipe that will surely sweeten your day.
Why You’ll Love This Old Fashioned Fudge
What sets this Old Fashioned Fudge apart is its velvety smooth texture and rich chocolate flavor. With just a few straightforward ingredients, you can whip up a batch that’ll rival any store-bought sweet! Making it at home can save you money while providing a much fresher and tastier alternative. There’s something satisfying about crafting your own confections and sharing them with family and friends. Plus, you can get creative with your fudge! Consider adding nuts or a sprinkle of sea salt to elevate the flavor. If you’ve enjoyed our Biscotti recipe, you’ll definitely appreciate the endeavor and simplicity of this delicious treat. Ready to get started? Let’s make some fudge magic!
How to Make Old Fashioned Fudge
Quick Overview
Old Fashioned Fudge is just the kind of recipe you need when you’re craving something delicious yet easy to prepare. With minimal prep time and a rich, satisfying outcome, this treat will be your go-to for sweet cravings. You can have it ready in about 30 minutes, and the hardest part? Waiting for it to cool and set!
Key Ingredients for Old Fashioned Fudge
To create this delightful fudge, you’ll need a few straightforward ingredients:
- 2 cups granulated sugar
- ½ cup unsweetened cocoa powder
- ½ cup milk
- 4 tablespoons unsalted butter
- 1 teaspoon vanilla extract
- 1 cup semi-sweet chocolate chips (optional)
- A pinch of salt
Step-by-Step Instructions
- Prepare the Setup: Start by greasing an 8-inch square baking dish with butter or lining it with parchment paper for easy removal later.
- Combine the Dry Ingredients: In a medium saucepan, whisk together the granulated sugar, cocoa powder, and salt until completely mixed.
- Add the Liquid Ingredients: Pour in the milk and add the butter. Place the saucepan over medium heat.
- Cook the Mixture: Stir the mixture continuously to ensure the sugar dissolves completely. Bring it to a boil, stirring constantly, then let it boil for about 2–3 minutes without stirring.
- Test for Doneness: To check if it’s ready, drop a small spoonful into a glass of cold water. It should form a soft ball. If not, let it cook for another minute and test again.
- Remove and Cool: Once done, remove the pan from the heat and let it cool for about 5 minutes without stirring.
- Add Stir-ins: Finally, stir in the vanilla extract and chocolate chips (if using) until melted and well combined.
- Set the Fudge: Pour the mixture into your prepped baking dish and spread evenly. Allow it to cool completely at room temperature or refrigerate for quicker setting.
- Cut and Serve: Once it’s firm, cut it into squares and enjoy your creamy, chocolatey delights!
What to Serve Old Fashioned Fudge With
Serving Old Fashioned Fudge can be just as fun as making it! Consider complementing these rich squares with a dollop of whipped cream or a scoop of vanilla ice cream for a wonderful contrast of textures. You could also offer it alongside fresh berries to balance out the sweetness. A strong cup of coffee or hot cocoa would pair perfectly, too, enhancing the overall flavor experience.
Top Tips for Perfecting Old Fashioned Fudge
- Be Patient with Heating: Ensure that you allow the mixture to reach the correct temperature; this step is crucial for that perfect texture.
- Use Fresh Ingredients: Fresh cocoa powder and chocolate chips will enhance the overall flavor significantly.
- Experiment with Flavors: Don’t hesitate to add nuts, coconut, or even a dash of peppermint extract for a fun twist!
- Storage Containers: Store your fudge in an airtight container to keep it fresh, and separate layers with wax paper to prevent sticking.
Storing and Reheating Tips
To keep your Old Fashioned Fudge at its best, store it in an airtight container at room temperature for up to two weeks. If you need to save it for longer, refrigerate it for up to a month! Want to enjoy it at a later date? You can freeze the fudge by wrapping it in plastic wrap and placing it in a freezer-safe bag. When ready to enjoy, simply let it sit at room temperature for a while or microwave it for just a few seconds—just enough to bring back that soft, fudgy goodness.
Now that you have all the ins and outs of making the perfect Old Fashioned Fudge, it’s time to grab your ingredients and start that sweet adventure! Happy cooking!
Old Fashioned Fudge
Ingredients
Method
- Grease an 8-inch square baking dish with butter or line it with parchment paper for easy removal.
- In a medium saucepan, whisk together the granulated sugar, cocoa powder, and salt until completely mixed.
- Pour in the milk and add the butter. Place the saucepan over medium heat.
- Stir the mixture continuously to ensure the sugar dissolves completely. Bring it to a boil, stirring constantly, then let it boil for about 2–3 minutes without stirring.
- To check if it’s ready, drop a small spoonful into a glass of cold water. It should form a soft ball. If not, let it cook for another minute and test again.
- Once done, remove the pan from the heat and let it cool for about 5 minutes without stirring.
- Stir in the vanilla extract and chocolate chips (if using) until melted and well combined.
- Pour the mixture into your prepped baking dish and spread evenly.
- Allow it to cool completely at room temperature or refrigerate for quicker setting.
- Once firm, cut it into squares and enjoy your creamy, chocolatey delights!
Leave a Reply