
No-Bake Samoa Cookies
Oh, the joy of No-Bake Samoa Cookies! Imagine a heavenly treat that combines the rich flavors of chocolate, caramel, and coconut, all while being super simple to make. Whether you’re looking to impress guests at family gatherings or simply craving a sweet indulgence after a long day, these cookies are sure to delight your taste buds. The best part? You don’t need to turn on the oven!
Thinking back to my childhood, I remember a family friend who would whip up a batch of something similar every summer. The moment those coconut-covered cookies were ready, we would all crowd around, eagerly waiting for our turn to snag a piece. They were so good, in fact, that I often learned the lesson that the way to a man’s heart is through his stomach—especially when those cookies were involved! If you love no-bake desserts as much as I do, you’ll definitely want to try my No-Bake Chocolate Oatmeal Cookies, too. They’re a sweet treat you won’t forget.
What is No-Bake Samoa Cookies?
Now, you might be wondering about the intriguing name “Samoa.” Is it a nod to the tropical islands, perhaps? Or maybe, it’s named after a delightful ninja cookie warrior? Who knows! What I can say is these no-bake cookies have become a cultural sensation in their own right. With each bite, you’re not just tasting a treat; you’re savoring a delightful experience that brings families together in the kitchen.
So, if you’re ready to discover just how easy it is to create these little morsels of joy, grab your apron and let’s start baking—err, rather, assembling!
Why You’ll Love This No-Bake Samoa Cookies
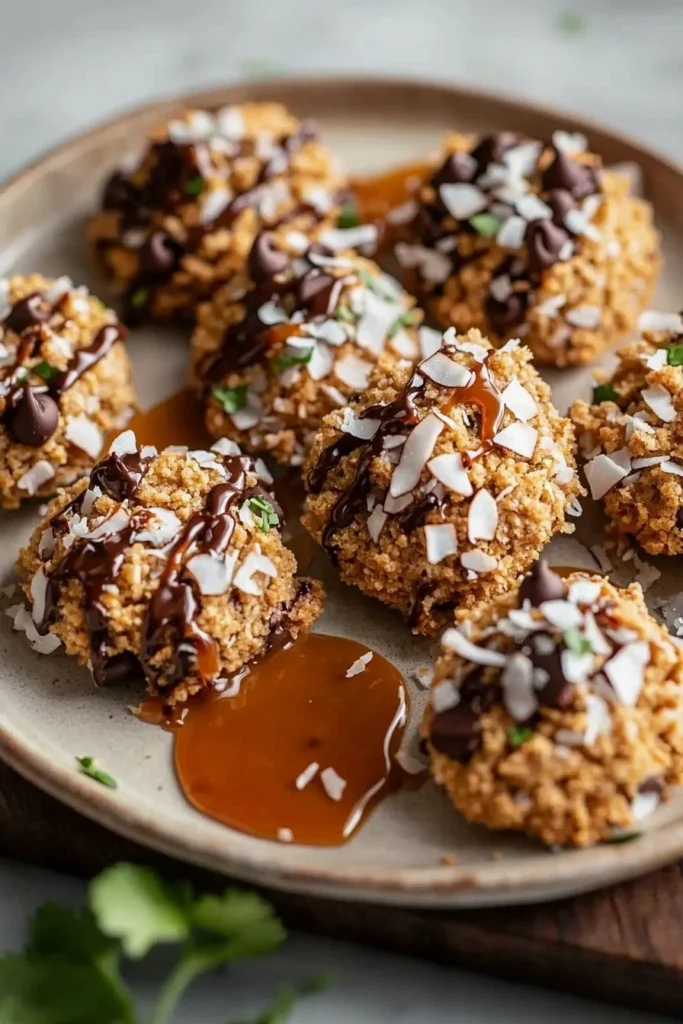
One of the best things about No-Bake Samoa Cookies is their delightful complexity packed into a simple recipe. Imagine biting into a velvety layer of chocolate that gives way to a sweet, chewy caramel and toasty coconut topping, all resting on a base of crunchy graham cracker crumbs. Sounds incredible, right?
Plus, making these cookies at home can save you a pretty penny compared to a store-bought equivalent. Why shell out for overpriced treats when you can whip up a batch of these delicious cookies in no time? I mean, while your friends are indulging in store-bought chocolate snacks, you can proudly serve up these homemade masterpieces. So, what are you waiting for? Let’s get mixing!
How to Make No-Bake Samoa Cookies
Quick Overview
Making No-Bake Samoa Cookies is as easy as pie—no oven required! This dessert takes only about 30 minutes to whip up and requires just a bit of chilling time. You’ll experience a satisfying crunch from the graham cracker base, contrasted with the rich, delectable toppings of coconut and chocolate. Talk about a crowd-pleaser!
Ingredients
To make No-Bake Samoa Cookies, you will need the following ingredients:
- 1 cup finely shredded unsweetened coconut
- 1 cup chocolate chips
- 1 cup caramel sauce (ensure it’s Halal-friendly)
- 2 cups graham cracker crumbs
- 1/2 cup unsalted butter, melted
- 1/2 teaspoon salt
Step-by-Step Instructions
- Prepare the Pan: Start by lining a baking dish with parchment paper. This will help you easily lift your cookies out later on.
- Mix the Base: In a large bowl, combine the graham cracker crumbs, melted butter, and salt. Stir until everything is well-combined and you have a crumbly mixture.
- Press the Base: Pour the mixture into your prepared baking dish and press it down firmly. Use a spatula or the back of a measuring cup to create an even layer.
- Add the Toppings: In a separate bowl, mix the caramel sauce with the shredded coconut. Spread this delightful mixture evenly over the graham cracker base.
- Melt the Chocolate: In a microwave-safe bowl, melt the chocolate chips in the microwave in 20-second intervals, stirring in between until smooth.
- Finish with Chocolate: Drizzle the melted chocolate over the coconut-caramel layer. You can use a fork to create a visually appealing pattern!
- Chill and Set: Place the dish in the refrigerator for at least 1 hour to allow the cookies to set. Once set, remove them from the dish using the parchment paper and cut them into squares or rectangles.
Top Tips for Perfecting No-Bake Samoa Cookies
- Substitutions: If you’re looking for a different flavor profile, consider using almond butter instead of the butter for a nutty twist. Just keep it halal-friendly!
- Timing: Ensure you let the chocolate cool slightly before drizzling; this prevents it from melting the caramel layer.
- Avoiding Common Mistakes: Make sure the graham cracker base is pressed down tightly. If it’s too loose, it won’t hold together well when cut.
Storing and Reheating Tips
To keep your No-Bake Samoa Cookies fresh, store them in an airtight container in the refrigerator. They can last up to a week, but I doubt they’ll last that long—everyone will be reaching for seconds! For longer storage, you can freeze them for up to 3 months. Just make sure to wrap each cookie individually in plastic wrap before placing them in a freezer bag.
When you’re ready to enjoy, simply take out the desired number of cookies and let them thaw at room temperature. They’ll be just as delicious as when they were first made!

Enjoy making your very own No-Bake Samoa Cookies, and watch them disappear in no time! These delightful bites are perfect for any occasion, whether it’s a cozy family gathering or a fun movie night. Trust me, once you’ve made these, you might just find yourself getting requests for them every week! What’s your favorite no-bake dessert? Share your thoughts below!
No-Bake Samoa Cookies
Ingredients
Method
- Start by lining a baking dish with parchment paper.
- In a large bowl, combine the graham cracker crumbs, melted butter, and salt. Stir until well-combined.
- Pour the mixture into the prepared baking dish and press it down firmly to create a base.
- In a separate bowl, mix the caramel sauce with the shredded coconut and spread it evenly over the graham cracker base.
- Melt the chocolate chips in a microwave-safe bowl in 20-second intervals, stirring until smooth.
- Drizzle the melted chocolate over the coconut-caramel layer.
- Chill the dish in the refrigerator for at least 1 hour to set.
- Once set, remove from the dish using the parchment paper and cut into squares or rectangles.
Leave a Reply