
No-Bake Rainbow Slice: A Delightful Treat for Any Occasion
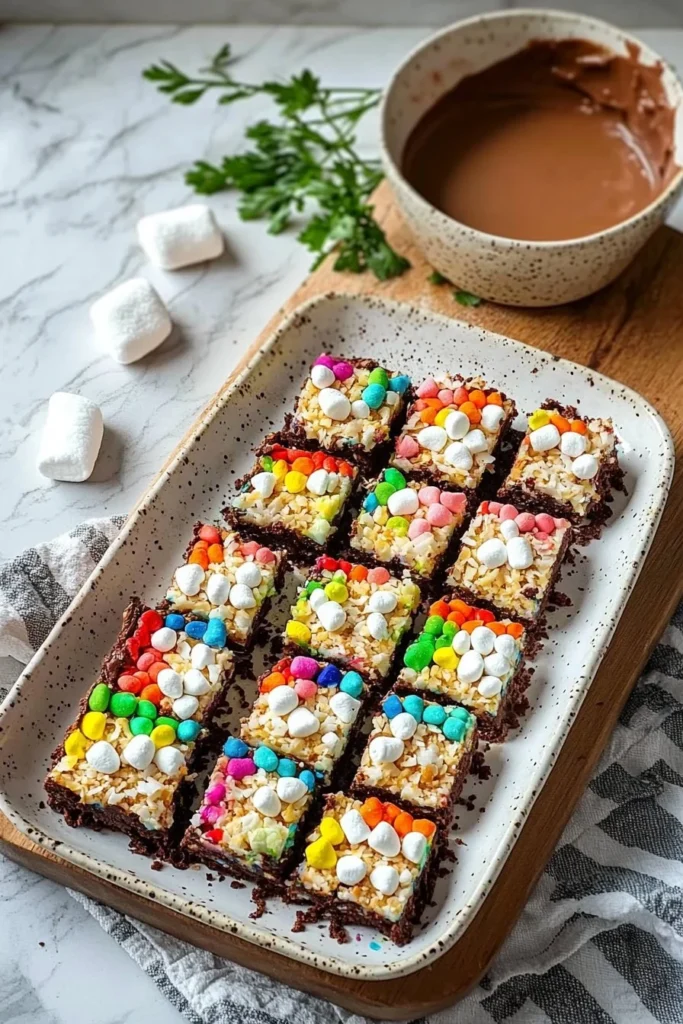
If you’re looking for a dessert that screams fun and flavor, look no further than this No-Bake Rainbow Slice! Imagine each colorful layer presenting a delightful mix of textures, from the crunchy biscuit base to the creamy, rich filling that just melts in your mouth. This dessert is not only a feast for the eyes but also a culinary adventure for your taste buds. It’s reminiscent of a bright, sunny day, perfect for family gatherings or cozy winter evenings. Did you know that vibrant colors in food often make it more appealing? This is just one reason why our charming No-Bake Rainbow Slice will steal the spotlight, much like our popular Chocolate Chip Cookie Bars.
With its incredible simplicity and whimsical appeal, this recipe is sure to bring a smile to the faces of your loved ones. After all, as they say, “the way to a man’s heart is through his stomach,” and what better way to win everyone over than with a slice of happiness?
What is No-Bake Rainbow Slice?
So, what’s in a name, you might ask? The No-Bake Rainbow Slice sounds like it should belong to a magical dessert fairy tale. This delightful treat is layered with rich flavors and a vibrant palette that can brighten any table. One could say that its name stems from the way each colorful layer comes together, resembling a rainbow—a tasty promise in every bite!
As you whip this wonderful slice together, you’ll be amazed at how simple it is to assemble, making it perfect for even the busiest of schedules. Ready to impress your family or guests? Let’s dive into this sweet adventure together!
Why You’ll Love This No-Bake Rainbow Slice
You’ll absolutely love this No-Bake Rainbow Slice for its unique combination of flavors, economical benefits of cooking at home, and limitless topping options. The crunchy biscuit base sets the stage for a perfectly creamy filling, while the vivid colors promise to tickle your senses.
Not only is it a visual masterpiece, but making this delightful treat at home saves money compared to a bakery specialty. Why splurge on store-bought desserts when you can create something equally enchanting from your kitchen? Top it with mini marshmallows or your favorite nuts for an additional textural layer that leaves you craving more! Grab your family and let’s make this delightful slice together!
How to Make No-Bake Rainbow Slice
Quick Overview
This No-Bake Rainbow Slice is an easy and satisfying dessert option, perfect for both beginners and seasoned bakers. With its textural contrast between the crunchy base and the creamy filling, and a preparation time of only 30 minutes, it’s definitely a recipe you’ll want to add to your regular lineup!
Ingredients
Here’s what you’ll need to make this delightful No-Bake Rainbow Slice:
- 1 cup crushed biscuits
- 1/2 cup unsweetened cocoa powder
- 1/2 cup melted butter
- 1/2 cup sweetened condensed milk
- 1/2 cup shredded coconut
- Food coloring (red, orange, yellow, green, blue, purple)
- 1/2 cup mini marshmallows (optional)
Remember to ensure all ingredients meet Halal compliance and avoid any non-compliant substitutes.
Step-by-Step Instructions
- Prepare the Base: In a mixing bowl, combine the crushed biscuits, cocoa powder, and melted butter. Stir until it forms a crumbly mixture.
- Add Sweetness: Incorporate sweetened condensed milk into the biscuit mixture. Mix until combined and then firmly press this mixture into a lined rectangular dish to form the base.
- Color Your Layers: In a separate bowl, take the shredded coconut and divide it into six smaller bowls. Add a few drops of different food colorings to each bowl, mixing until the coconut is brightly colored.
- Layer It Up: Gently sprinkle the colored coconut over the base, creating a rainbow effect. Start with red, then orange, yellow, green, blue, and finally purple. Press each layer down gently to keep them intact.
- Chill to Set: Place the dish in the refrigerator to chill for at least two hours or until set.
- Add the Topping: Once set, you have the option to top with mini marshmallows for an added layer of fun!
- Slice and Serve: After chilling, slice it into squares or rectangles and serve. Enjoy the delightfully colorful treat with friends and family!
Top Tips for Perfecting No-Bake Rainbow Slice
- Ingredient Substitutions: If you need a nut-free option, you can replace biscuits with gluten-free varieties. Also, opt for Halal-certified ingredients for compliance.
- Setting Time: Make sure you allow enough time for the slice to fully set in the refrigerator. Patience is key to achieving the perfect texture.
- Avoiding Crumbliness: Make sure to press the base down firmly to avoid a crumbly slice. This will help the layers adhere together beautifully.
Storing and Reheating Tips
To enjoy your No-Bake Rainbow Slice later, store it in the refrigerator, where it will last for up to one week. For longer preservation, you can freeze it, wrapped tightly in foil or in an airtight container, for up to three months.
When you’re ready to enjoy it again, simply let it thaw in the refrigerator for a few hours until it reaches the perfect consistency. This will help maintain the delightful flavors and textures you’ve created, making it just as delicious as the day you first made it!
Now that you have the complete guide to making an eye-catching and delectable No-Bake Rainbow Slice, it’s time to put on your apron and treat yourself and your loved ones to this fun dessert. Get ready to make some colorful memories in your kitchen!
No-Bake Rainbow Slice
Ingredients
Method
- In a mixing bowl, combine the crushed biscuits, cocoa powder, and melted butter. Stir until it forms a crumbly mixture.
- Incorporate the sweetened condensed milk into the biscuit mixture. Mix until combined and then firmly press this mixture into a lined rectangular dish to form the base.
- In a separate bowl, take the shredded coconut and divide it into six smaller bowls. Add a few drops of different food colorings to each bowl, mixing until the coconut is brightly colored.
- Gently sprinkle the colored coconut over the base, creating a rainbow effect. Start with red, then orange, yellow, green, blue, and finally purple. Press each layer down gently to keep them intact.
- Place the dish in the refrigerator to chill for at least two hours or until set.
- Once set, top with mini marshmallows for an added layer of fun!
- After chilling, slice it into squares or rectangles and serve.
Leave a Reply