
Ah, the delightful world of pastries! If you’re on the lookout for a treat that perfectly blends crispy texture with a luscious, creamy filling, then Mini Cream-Filled Pastry Cups are calling your name! Imagine crunching into a delicate shell only to discover a sweet, velvety center that dances on your palate. These little wonders are not just delicious; they evoke heartwarming memories of family gatherings, laughter around the table, and the joy of sharing food with loved ones. Did you know that the phrase “the way to a man’s heart is through his stomach” has never been more true than when these pastries are involved?
Simple to make and oh-so-impressive, these mini cups offer a delightful alternative to heavier desserts, making them a perfect recommendation for anyone who enjoyed my popular Chocolate Lava Cake recipe. Are you ready to embrace the magic of these pastry cups for your next gathering? Let’s dive into the details!
What are Mini Cream-Filled Pastry Cups?
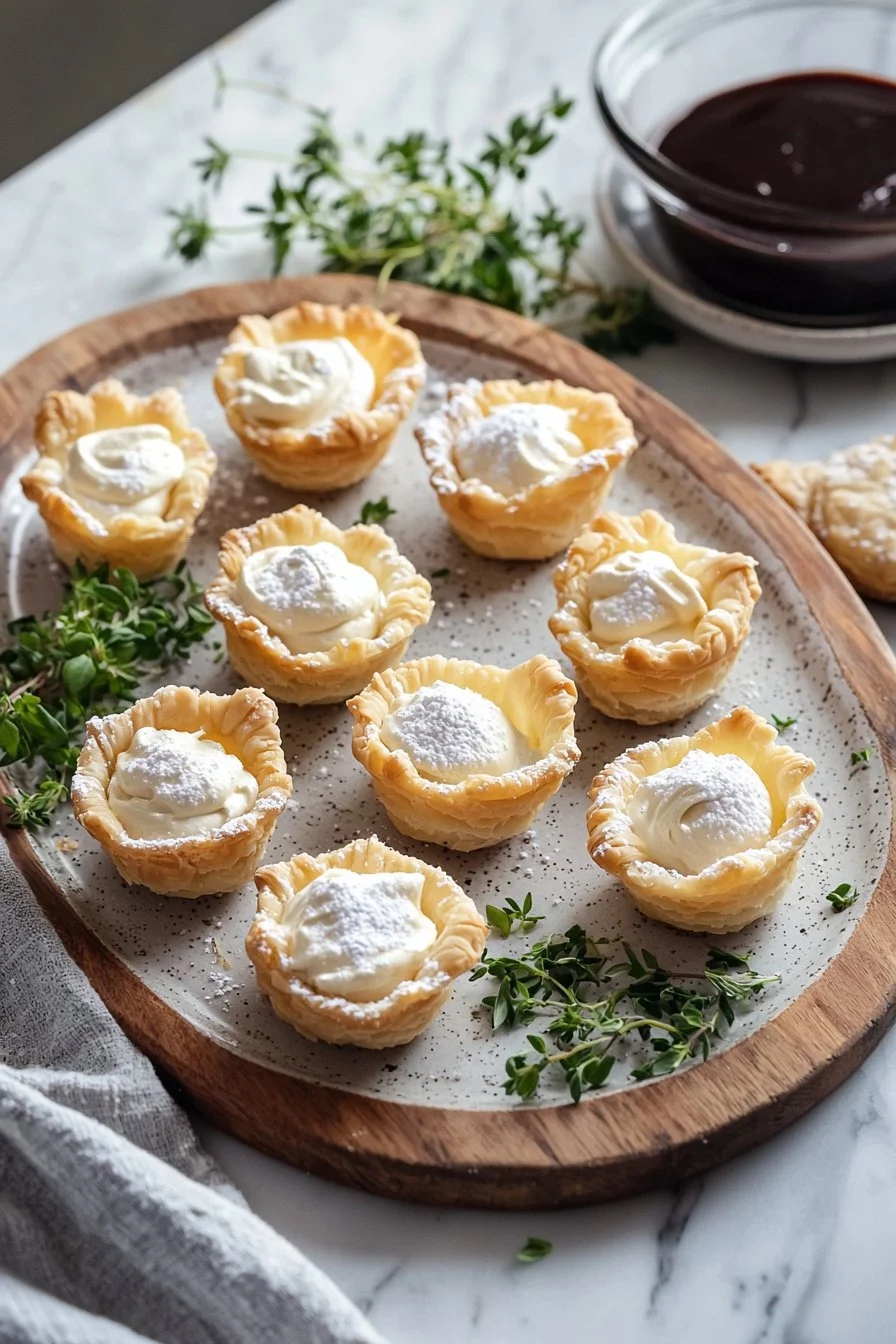
You might be wondering, “What’s in a name?” Well, Mini Cream-Filled Pastry Cups are exactly what they sound like! These charming little pastries are cups made from flaky puff pastry, filled with a heavenly vanilla cream that will melt in your mouth. It’s funny to think how something so small can instantly become the star of the dessert table, isn’t it? Each bite is a tiny moment of joy, making them perfect for all ages. And let’s not forget that ever-popular saying, “the way to a man’s heart is through his stomach.” With these mini delights, hearts (and taste buds) are sure to flutter! So why not whip up a batch and see how quickly they disappear?
Why You’ll Love This Mini Cream-Filled Pastry Cups
Let me tell you, there are so many reasons to fall head over heels for these Mini Cream-Filled Pastry Cups! First off, they are a fantastic crowd-pleaser that will transport your guests to dessert heaven with their buttery, flaky crust and silky cream filling. Cooking at home not only saves you money, but it also invites creativity into your kitchen. Why settle for store-bought when you can infuse love and flavor right at home?
And let’s talk about the toppings! Imagine these delicate pastry cups elegantly dusted with powdered sugar or drizzled with rich chocolate sauce, making them a sensational treat reminiscent of gourmet desserts from a high-end bakery. Just think of them as perfect companions to a cozy family movie night or any indoor gathering, promising delightful bursts of flavor with every bite. So, what are you waiting for? Grab your apron and let’s create something magical!
How to Make Mini Cream-Filled Pastry Cups
Quick Overview
If you’ve ever wished for a dessert that’s both easy and satisfying, look no further! These Mini Cream-Filled Pastry Cups come together effortlessly, providing a delightful crunch complemented by the smooth richness of the filling. With a preparation time of just about 30 minutes, you’ll soon have a platter of these treats ready to impress everyone around you.
Ingredients
Here’s what you’ll need to create your own Mini Cream-Filled Pastry Cups:
- 1 package of mini puff pastry cups (approximately 15-20 cups)
- 1 cup vanilla cream filling (store-bought or homemade)
- Powdered sugar, for dusting
- Chocolate sauce (optional, for drizzling)
Step-by-Step Instructions
- Preheat the Oven: Begin by preheating your oven to 400°F (200°C). This ensures that your pastry cups will bake evenly and become irresistibly crispy.
- Bake the Pastry Cups: Arrange the mini puff pastry cups on a baking sheet. Follow the package instructions, usually baking for around 12-15 minutes until they are golden brown and puffed up. Keep an eye on them to avoid over-baking!
- Prepare the Cream Filling: If you’re making homemade vanilla cream filling, whisk together heavy cream, sugar, and vanilla extract until soft peaks form. If you’re using store-bought, simply set it aside.
- Cool the Cups: Once the pastry cups are baked, remove them from the oven and allow them to cool completely.
- Fill the Cups: Once cooled, carefully fill each pastry cup with the vanilla cream filling using a piping bag or spoon. Don’t hold back on the filling!
- Add Toppings: Lightly dust with powdered sugar and drizzle with chocolate sauce if desired.
- Serve and Enjoy: Your Mini Cream-Filled Pastry Cups are now ready to serve! Gather your family and enjoy a sweet moment together.
Top Tips for Perfecting Mini Cream-Filled Pastry Cups
Here are some expert tips to enhance your Mini Cream-Filled Pastry Cups:
- Puff Pastry Tips: For an even flakier texture, ensure your puff pastry is kept chilled until just before baking. This helps it rise beautifully.
- Filling Substitutions: If you want to mix things up, consider flavors like coffee cream or fruit-infused creams. Just make sure any ingredients used are Halal-friendly.
- Avoiding Common Mistakes: Don’t skip the cooling step! Filling warm pastry can lead to a soggy bottom—nobody wants that.
- Presentation Matters: If you plan to impress, consider garnishing with fresh berries or a sprig of mint for an upscale look.
Storing and Reheating Tips
To keep your Mini Cream-Filled Pastry Cups fresh:
- Refrigeration: Store any leftover pastry cups in an airtight container in the refrigerator for up to 3 days. However, for the best taste and texture, enjoy them fresh!
- Freezing: You can freeze the baked pastry cups (without filling) in a freezer-safe container for up to 2 months. When you’re ready to enjoy them, thaw and fill them with cream right before serving.
- Reheating: To maintain that delicious crunch, reheat the pastry cups in a preheated oven at 350°F (175°C) for about 5-7 minutes. This will restore their original crispiness!
Cooking up these Mini Cream-Filled Pastry Cups not only brings joy and sweetness to your plate but also makes for an enjoyable experience in the kitchen. So get cooking, and may your families and friends delight in every cream-filled bite!
FAQs
- Can I use different flavors for the filling?
Absolutely! Feel free to experiment with different flavors like chocolate or fruit-based fillings as long as they adhere to Halal guidelines. - How do I know when the pastry cups are done baking?
They should be golden brown and puffed up. A quick visual check halfway through can help ensure they aren’t browning too quickly. - Can these be made ahead of time?
Yes, the pastry cups can be baked and stored. Just fill them with the cream close to your serving time for the best taste.
So, roll up your sleeves, gather your ingredients, and make some Mini Cream-Filled Pastry Cups. Happy baking!
Mini Cream-Filled Pastry Cups
Ingredients
Method
- Preheat your oven to 400°F (200°C).
- Arrange the mini puff pastry cups on a baking sheet and bake for 12-15 minutes until golden brown.
- Whisk together heavy cream, sugar, and vanilla extract until soft peaks form or set aside store-bought cream.
- Allow the baked cups to cool completely.
- Fill each cooled pastry cup with the vanilla cream filling using a piping bag or spoon.
- Dust lightly with powdered sugar and drizzle with chocolate sauce if desired.
- Serve and enjoy your Mini Cream-Filled Pastry Cups!
Leave a Reply