
There’s something irresistible about a perfectly baked tartlet shell—crisp on the outside, light and airy on the inside. These delightful little creations can hold a variety of fillings, making them the perfect canvas for both savory and sweet flavors. It’s no wonder that homemade tartlet shells have found a special place in kitchens across the globe. I remember the first time I made these with my grandmother; it was a joyful evening, filled with laughter and a few flour fights. What makes these tartlet shells truly special is their simplicity and how they bring families together. If you love these delectable bites, you might also enjoy my easy quiche recipe that captures similar textures but takes a different route with flavors. Ready to dive into the world of homemade tartlet shells? Let’s get started!

What is Homemade Tartlet Shells?
So, what’s the deal with the name “tartlet”? Are they like tiny tarts or just trying to be fancy? Either way, they are a delightful treat that can elevate any gathering or family dinner. It’s true what they say: the way to a man’s heart is through his stomach! Whether you’re filling them with a rich custard or a refreshing fruit compote, tartlet shells are always a hit. Picture this: you host a cozy evening with family, and surprise them with these delectable bites! They won’t stand a chance; they’ll be devoured in seconds! So, gather your loved ones and grab the ingredients because a delicious adventure awaits you!
Why You’ll Love This Homemade Tartlet Shells
Homemade tartlet shells are the star of any meal, whether served as appetizers or decadent desserts. Their flaky, buttery texture will have your taste buds dancing with joy! Plus, making them at home is a cost-effective option compared to store-bought versions, which often come with a hefty price tag and dubious ingredients. Imagine trying these shells filled with a savory mushroom mixture, reminiscent of gourmet bistro fare, without even leaving your kitchen! Need another reason to whip these up? The fillings are limitless! From creamy cheese mixes to zesty vegetable medleys, the flavor combinations are endless. What are you waiting for? It’s time to roll up your sleeves and make some magic in the kitchen!
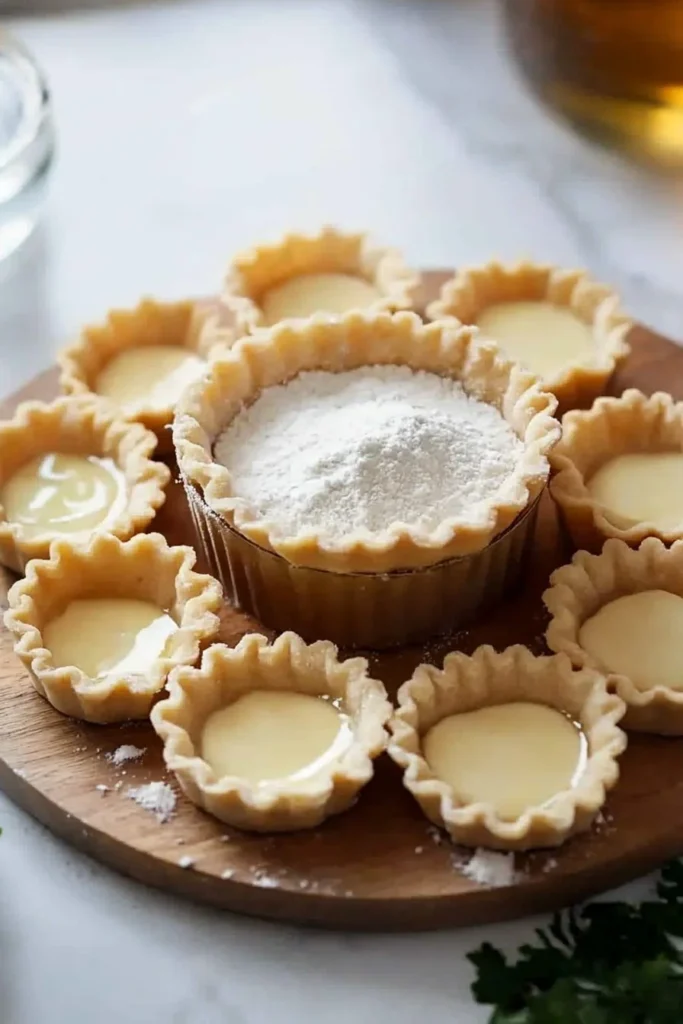
How to Make Homemade Tartlet Shells
Quick Overview
Creating homemade tartlet shells is straightforward and rewarding, making it perfect for both novice and experienced bakers. Imagine biting into a crispy shell that gives way to a light, delicate interior, filled with your favorite toppings. Preparation takes about 30 minutes, with a bit more time for cooling.
Ingredients for Homemade Tartlet Shells
To get started on your homemade tartlet shells, here’s what you’ll need:
- 1 ½ cups all-purpose flour
- ½ cup unsalted butter, chilled and cubed
- 2 tablespoons sugar
- ¼ teaspoon salt
- 4-5 tablespoons cold water
Feel free to adjust the sugar if you’re planning to use savory fillings!
Step-by-Step Instructions
- Prepare Your Ingredients: In a large mixing bowl, combine the flour, sugar, and salt. Mix well to evenly distribute the ingredients.
- Incorporate the Butter: Add the chilled, cubed butter into the flour mixture. Using your fingers, a pastry cutter, or a fork, blend the butter into the flour until the mixture resembles coarse crumbs.
- Add the Water: Gradually sprinkle cold water over the flour mixture, one tablespoon at a time. Gently stir until the dough begins to come together—be careful not to overwork it!
- Chill the Dough: Form the dough into a ball, flatten it slightly into a disk, wrap in plastic, and refrigerate for at least 30 minutes. Chilling helps maintain the flaky texture.
- Preheat and Roll Out: When you’re ready to bake, preheat your oven to 375°F (190°C). On a floured surface, roll out the dough to a thickness of about 1/8 inch.
- Shape the Shells: Use a round cutter to cut out circles of dough, and gently press them into a tartlet tin. Prick the bottoms with a fork to prevent bubbling.
- Bake Blind: Place your tartlet shells in the oven and bake for approximately 15-20 minutes, or until they are lightly golden and crisp.
- Cool Before Filling: Once baked, remove them from the oven and let them cool completely before adding your favorite fillings.
Top Tips for Perfecting Homemade Tartlet Shells
- Make it Your Own: If you’re looking for variations, consider substituting all-purpose flour with almond flour for a nutty flavor or whole wheat flour for additional nutrition.
- Timing is Key: Keep an eye on your shells as they bake. If they start to brown too quickly, cover them lightly with aluminum foil.
- Avoiding Common Mistakes: Overmixing can lead to tough shells, so handle the dough gently. Also, letting the dough chill is crucial for achieving that flaky texture.
Storing and Reheating Tips
Homemade tartlet shells can be stored in an airtight container for up to five days at room temperature, but they taste best when fresh. If you want to make them ahead of time, consider freezing them! To freeze, place the baked shells in a single layer in a sealed container. They can last up to two months in the freezer. To reheat, simply pop them in a 350°F (175°C) oven for about 10 minutes to restore their crispiness.
Now that you’re armed with this comprehensive guide on homemade tartlet shells, it’s time to get baking! Whether you choose a sweet or savory filling, these delightful bites will surely impress your family. Enjoy the process and, of course, the delicious results! Happy baking!
Homemade Tartlet Shells
Ingredients
Method
- In a large mixing bowl, combine the flour, sugar, and salt. Mix well to evenly distribute the ingredients.
- Add the chilled, cubed butter into the flour mixture. Using your fingers, a pastry cutter, or a fork, blend the butter into the flour until the mixture resembles coarse crumbs.
- Gradually sprinkle cold water over the flour mixture, one tablespoon at a time. Gently stir until the dough begins to come together—be careful not to overwork it!
- Form the dough into a ball, flatten it slightly into a disk, wrap in plastic, and refrigerate for at least 30 minutes.
- Preheat your oven to 375°F (190°C). On a floured surface, roll out the dough to a thickness of about 1/8 inch.
- Use a round cutter to cut out circles of dough, and gently press them into a tartlet tin. Prick the bottoms with a fork to prevent bubbling.
- Place your tartlet shells in the oven and bake for approximately 15-20 minutes, or until they are lightly golden and crisp.
- Once baked, remove them from the oven and let them cool completely before adding your favorite fillings.
Leave a Reply