
Homemade Freezer Pops: Your Ultimate Summer Cool-Down
When the sun blazes and temperatures soar, there’s just one thing that can make it all bearable – a sweet, refreshing Homemade Freezer Pop! Bursting with vibrant flavors and ideal for cooling off on hot summer days, these pops are the perfect treat for family gatherings or lazy afternoons. The joy of Homemade Freezer Pops lies in their simplicity; just a few ingredients can transform into a fun, colorful snack that delights people of all ages.
Did you know that the concept of freezing flavored juices into pops goes back over a century? It’s a nostalgic treat that pokes fun at our childhood whims—remember those frozen treats from the ice cream truck? Homemade Freezer Pops are equally enjoyable and a healthier option for cooling down compared to store-bought varieties packed with artificial flavors. If you’ve tried my popular Berry Smoothie Bowl recipe, then you’ll love how easy it is to whip up your own popsicles bursting with real fruit flavor!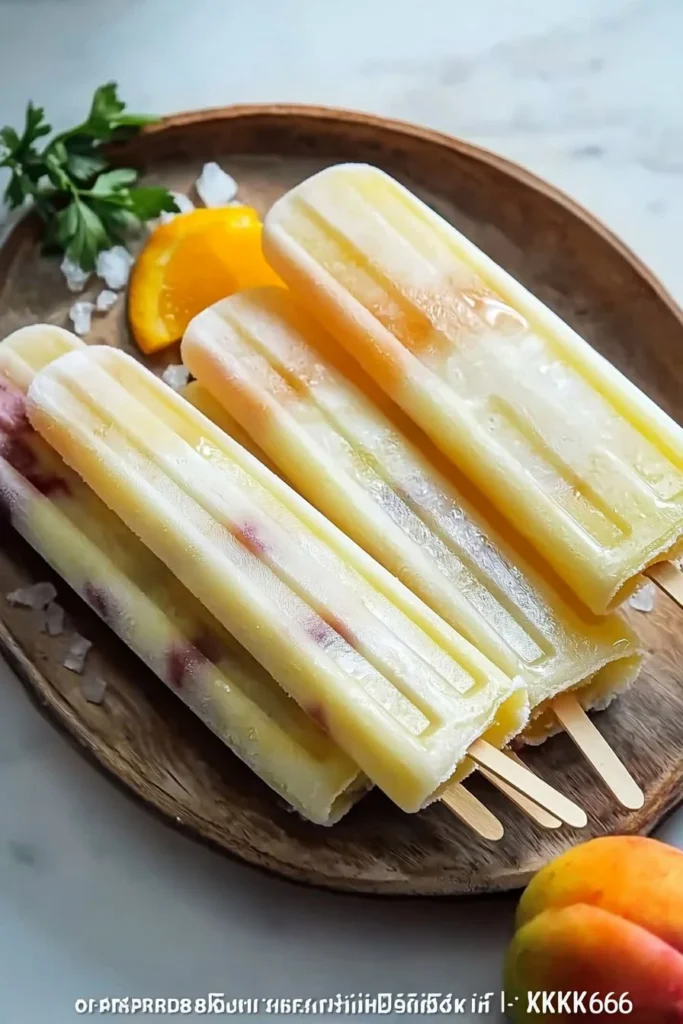
What are Homemade Freezer Pops?
So, what exactly are Homemade Freezer Pops? Some might argue they should have a fancier name, but let’s be honest; the simplicity is where the charm lies! Picture this: a hot day, your kitchen becomes a mini ice cream factory, and in no time at all, you’ve created refreshing pops that satisfy everybody’s cravings. The real magic happens when you pick your favorite fruit juice, mix in some fresh fruit pieces, and freeze it into vibrant pops. After all, they say the way to a man’s heart is through his stomach—well, these pops will have everyone raving! Dive into the joy of making your own, and I promise you’ll be hooked!
Why You’ll Love These Homemade Freezer Pops
There’s something truly special about Homemade Freezer Pops; they are not just a snack—they’re an experience! First, they highlight the delightful taste of fruit juices; think rich orange, sweet berry, or tart apple flavors, all captured in a handy pop. Second, making these pops at home saves you money and is perfect for budgets, allowing you to indulge in a guilt-free dessert without breaking the bank. Lastly, the options for flavorful toppings are endless! Fresh fruit pieces, nuts, and even a hint of coconut can elevate these freezes to a gourmet level.
Imagine this: a sunny afternoon, and you’ll have your squad enjoying Homemade Freezer Pops while reminiscing about summers past. It’s the perfect family treat that brings everyone together, similar to the popular Frozen Yogurt Bar I shared last summer! So why wait? Grab your molds, bring out the juice, and let’s get freezing!
How to Make Homemade Freezer Pops
Quick Overview
Making Homemade Freezer Pops is loads of fun and incredibly satisfying! They offer a delightful combination of creamy and icy textures with every bite. With just around 15 minutes of prep time, you’ll be able to enjoy these delicious frozen treats in just a few hours.
Ingredients
- 2 cups fruit juice (such as orange, apple, or berry)
- 1-2 tablespoons sweetener (like honey or sugar, optional)
- Fresh fruit pieces (optional, for added flavor and decoration)
Step-by-Step Instructions
- Get Your Supplies: Gather your fruit juice of choice, sweetener (if desired), fresh fruit pieces, and some popsicle molds.
- Mix It Up: In a large mixing bowl, combine the fruit juice with the sweetener—taste it to ensure it’s sweet enough for your liking.
- Add Fresh Fruit: If you’re using fresh fruit pieces, toss them into the juice mixture, giving it a gentle stir to distribute the fruit throughout.
- Pour into Molds: Carefully pour the juice and fruit mixture into your popsicle molds, leaving a tiny bit of space at the top as it might expand when freezing.
- Insert Sticks: Place the popsicle sticks into the molds, ensuring they are centered.
- Freeze: Put the molds in the freezer for at least 4-6 hours, or until completely frozen.
- Enjoy: Once frozen, gently remove the pops from the molds by running them under warm water for a few seconds.
Top Tips for Perfecting Homemade Freezer Pops
- Substitutions: Feel free to substitute the fruit juice with any favorite flavored liquid—like coconut water for a tropical twist! If sugar isn’t your thing, try using date syrup or agave as a sweetener.
- Timing: Check your pops after 4 hours—if they’re still not completely frozen, let them sit a little longer. The waiting will be worth it!
- Common Mistakes: Avoid overfilling the molds to prevent spills. And remember, the pops will freeze completely; if they are difficult to remove, run them under warm water for a few seconds.
Storing and Reheating Tips
To extend the shelf life of your Homemade Freezer Pops, keep them stored in an airtight container or freezer bag. They can last up to 2 months in the freezer, maintaining their flavor and texture for multiple warm days to come! There’s typically no need to reheat these pops, as they are meant to be enjoyed frozen; simply pop them out of the molds and enjoy right away.
Now that you’re all set to make your own Homemade Freezer Pops, you’ve got the perfect treat for family gatherings or just a quiet evening at home. Your taste buds will thank you later—grab those molds and let’s get popping!
Homemade Freezer Pops
Ingredients
Method
- Gather your fruit juice of choice, sweetener (if desired), fresh fruit pieces, and some popsicle molds.
- In a large mixing bowl, combine the fruit juice with the sweetener—taste it to ensure it’s sweet enough for your liking.
- If you’re using fresh fruit pieces, toss them into the juice mixture, giving it a gentle stir to distribute the fruit throughout.
- Carefully pour the juice and fruit mixture into your popsicle molds, leaving a tiny bit of space at the top as it might expand when freezing.
- Place the popsicle sticks into the molds, ensuring they are centered.
- Put the molds in the freezer for at least 4-6 hours, or until completely frozen.
- Once frozen, gently remove the pops from the molds by running them under warm water for a few seconds.
Leave a Reply