
If you’re hunting for the perfect blend of comfort and creativity in your kitchen, look no further than the Grilled Cheese Burrito. Imagine sinking your teeth into a crispy, cheesy exterior that gives way to a warm, gooey center; it’s like uniting two of your favorite comforting foods into one delicious dish! This recipe brilliantly combines the classic grilled cheese with the ever-popular burrito, transforming a simple meal into a crowd-pleaser.
Growing up, my family often indulged in cheesy sandwiches and hearty burritos during those chilly evenings at home, sparking many memorable moments. This dish offers a nostalgic flavor profile, yet it’s incredibly simple to prepare, making it the perfect choice for family gatherings. Unlike some gourmet recipes that leave you with a pile of dishes, the Grilled Cheese Burrito stands out for its minimal fuss and maximal flavor—much like my famous Spicy Chickpea Curry. Ready to indulge? Let’s dive into this cheesy creation!
What is Grilled Cheese Burrito?
Have you ever asked yourself how something this delicious came to be? A burrito filled with melted cheese sounds almost too good to be true—especially with that crispy golden exterior! The origin of the Grilled Cheese Burrito may remain a mystery, but one thing’s for sure: it’s a dish that speaks to the heart. After all, you know what they say: the way to a man’s heart is through his stomach! There’s something magical about the combination of toasty bread, bubbling cheese, and savory fillings that makes food lovers everywhere rejoice. Ready to embark on a flavor journey? Let’s roll up those sleeves and get cooking!
Why You’ll Love This Grilled Cheese Burrito
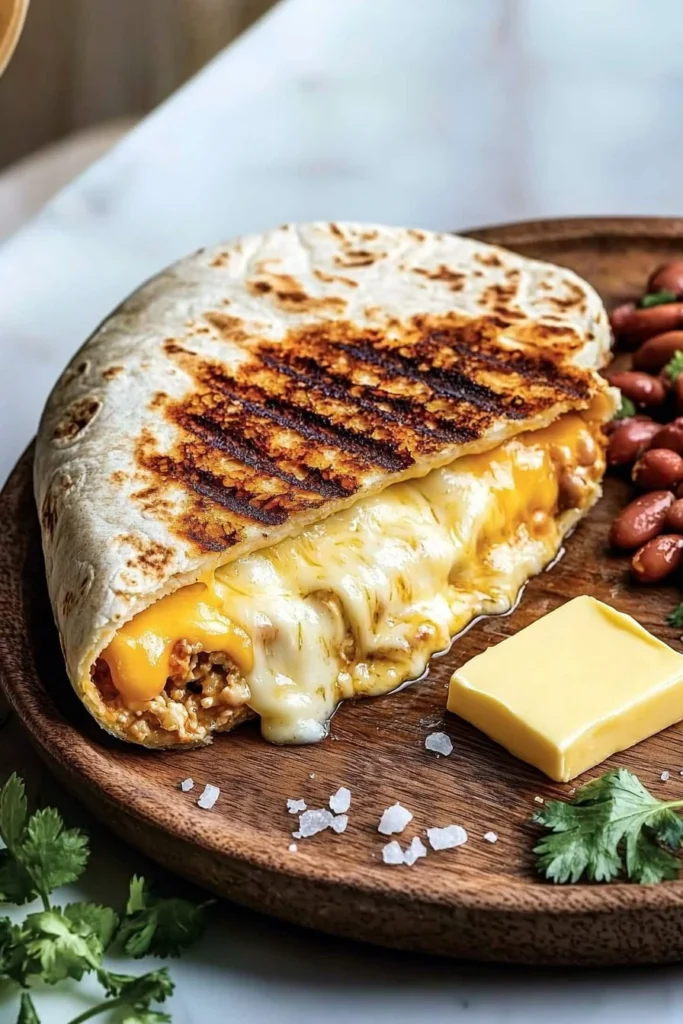
The Grilled Cheese Burrito is not just another ordinary dish; it’s an experience. Imagine biting into a warm tortilla packed with melting cheese, nestled cozily among flavorful fillings like grilled chicken or roasted vegetables. The crunchy outside gives way to a gooey, flavorful delight that dances in your mouth, making it the perfect main dish for any occasion.
Another great aspect? Cooking at home saves you money while allowing you to customize your fillings as you please. Feeling adventurous with flavor? Try swapping in some black beans or a medley of veg for a hearty vegetarian option. The vast universe of toppings is yours to explore! After indulging in this cheesy burrito, you may find it hard to return to simpler meals. So why not whip up your own Grilled Cheese Burrito tonight?
How to Make Grilled Cheese Burrito
Quick Overview
The Grilled Cheese Burrito is easy to assemble, making it the ultimate comfort food for a quiet evening or a lively family gathering. You get a layered experience of flavors and textures with each bite—perfectly crispy on the outside and beautifully melted on the inside. Plus, preparing this dish will take about 15 minutes from start to finish!
Ingredients
To make delicious Grilled Cheese Burritos, gather the following ingredients:
- 2 slices of bread (white, whole wheat, or sourdough—your choice!)
- 2 slices of cheese (cheddar, mozzarella, or your favorite melting cheese)
- 1 large tortilla (flour or whole wheat)
- Butter (for grilling)
- Additional fillings (suggestions: grilled chicken, black beans, sautéed vegetables, or even avocado)
Step-by-Step Instructions
- Prep Your Ingredients: Lay out your slices of bread and cheese, and gather your optional fillings for easy access.
- Heat a Pan: Place a large skillet over medium heat and add a small pat of butter, letting it melt. This will give your burrito a delicious, crispy crust.
- Assemble the Sandwich: Place one slice of bread on the skillet. Layer on one slice of cheese, then add your desired fillings, and top with the second slice of cheese. Finally, place the second slice of bread on top.
- Grill It Up: Once the cheese begins to melt, place the tortilla over the sandwich in the skillet. Carefully flip the sandwich so the tortilla is now on the bottom and the sandwich is on top of it. Press down gently.
- Perfecting the Crust: Allow the sandwich to grill on this side until the bread turns golden brown. Gently flip the whole thing again, allowing the other side to crisp up beautifully.
- Serve and Enjoy: Once both sides are crispy and the cheese is thoroughly melted, remove from the heat. Slice in half and serve while hot!
Top Tips for Perfecting Grilled Cheese Burrito
- Substitutions: Feel free to swap in your favorite cheeses or add healthy fillings like spinach and bell peppers to pack in more flavor and nutrients.
- Timing: Keep an eye on the heat; if it’s too hot, the bread may burn before the cheese has a chance to melt.
- Avoiding Common Mistakes: Always ensure the cheese is given enough time to melt fully before flipping! Otherwise, you’ll be left with a messy burrito.
Storing and Reheating Tips
If you happen to have leftovers (a rare occurrence!), here’s how to store them properly. This Grilled Cheese Burrito can be refrigerated for up to 3 days in an airtight container. When it comes to reheating, nothing compares to a skillet! Simply place it in a skillet over medium heat until warmed through, ensuring that it maintains its crispy texture. For longer storage, you can freeze the burritos before grilling; simply thaw and follow the cooking instructions when ready to eat.
Get ready to delight your family with a fantastic Grilled Cheese Burrito! Try it out for your next family gathering, and watch everyone clamor for seconds.

Do you have questions about our Grilled Cheese Burrito? Ask away in the comments below!
Grilled Cheese Burrito
Ingredients
Method
- Lay out your slices of bread and cheese, and gather your optional fillings for easy access.
- Place a large skillet over medium heat and add a small pat of butter, letting it melt.
- Place one slice of bread on the skillet. Layer on one slice of cheese, then add your desired fillings, and top with the second slice of cheese. Finally, place the second slice of bread on top.
- Once the cheese begins to melt, place the tortilla over the sandwich in the skillet. Carefully flip the sandwich so the tortilla is now on the bottom and the sandwich is on top of it. Press down gently.
- Allow the sandwich to grill on this side until the bread turns golden brown. Gently flip the whole thing again, allowing the other side to crisp up beautifully.
- Once both sides are crispy and the cheese is thoroughly melted, remove from the heat. Slice in half and serve while hot!
Leave a Reply