
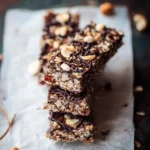
There’s nothing quite like the combination of rich chocolate and crunchy hazelnuts, and what better way to enjoy this delightful pairing than in a homemade granola bar? These Chocolate Hazelnut Granola Bars are not only delicious but also easy to whip up, making them perfect for a quick breakfast or a satisfying snack. What’s even more fun is that you can customize them to your heart’s content. Imae biting into a bar packed with the creamy goodness of chocolate and the nutty crunch of hazelnuts! They are so simple to make, you’ll wonder why you ever bought packaged snacks. Perfect for busy families or anyone looking for a healthier treat, these granola bars are sure to be a hit!
You might be wondering how these bars stack up against other popular recipes on the blog, like oatmeal cookies or nut bars. While both are delicious and nutritious, these Chocolate Hazelnut Granola Bars hit all the right notes with chocolate lovers, providing that extra indulgence without sacrificing health. Get ready to be excited about making these at home!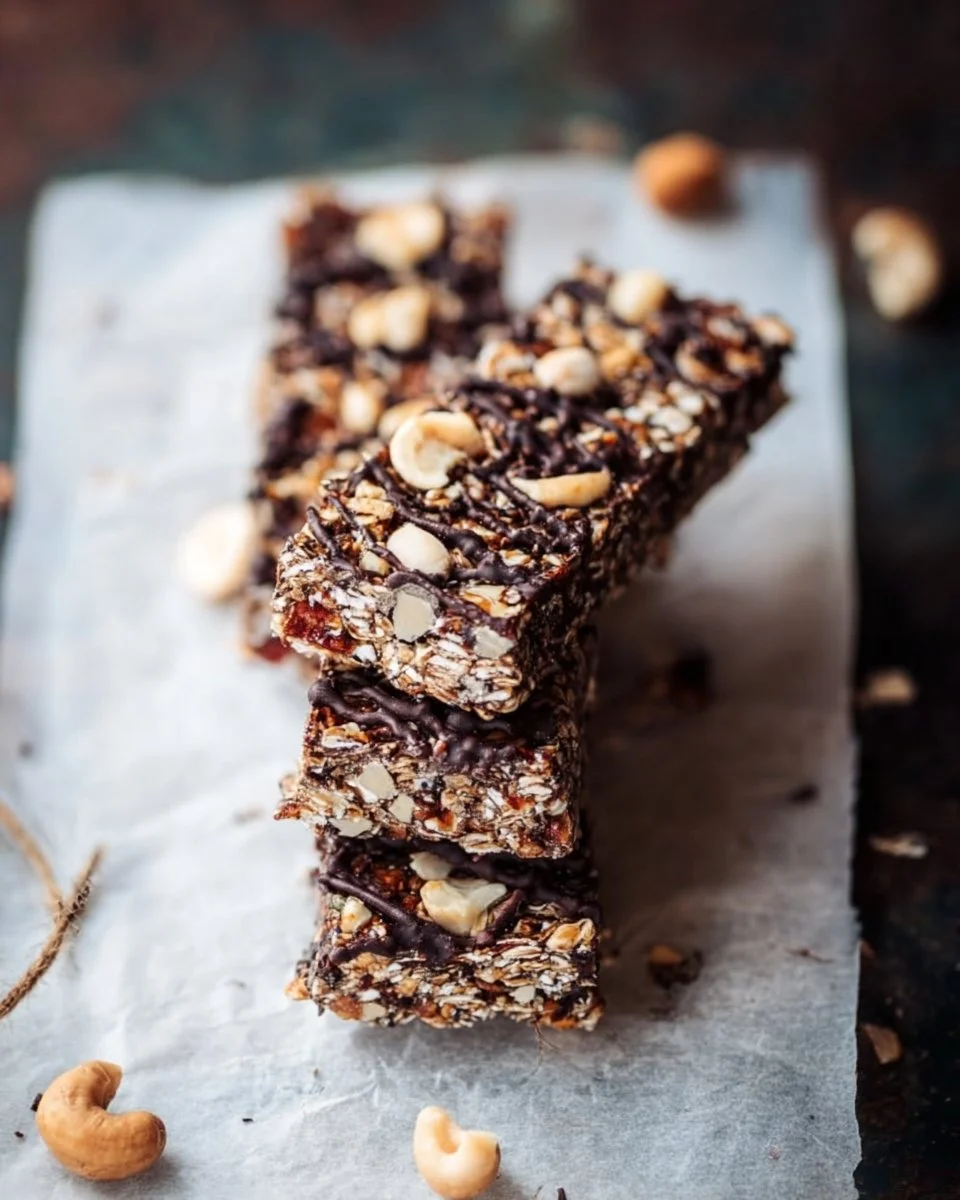
What are Chocolate Hazelnut Granola Bars?
So, what exactly are Chocolate Hazelnut Granola Bars? Well, picture this: hearty oats are combined with crunchy hazelnuts and drizzled with rich chocolate to create a satisfying snack that can be enjoyed anytime. Isn’t that an intriguing image? Why are they called granola bars, you ask? Because they are made from granola, of course! And we all know the saying, “the way to a man’s heart is through his stomach.” This snack certainly has the potential to steal a few hearts in the process. Don’t just take my word for it; try making them yourself and see how these bars earn a special place in your snack rotation!
Why You’ll Love These Chocolate Hazelnut Granola Bars
There are three standout reasons to fall in love with these granola bars. Firstly, they are incredibly versatile! You can enjoy them on their own, or you can add in your favorite mix-ins, like dried fruits or coconut flakes. The second reason is the cost-saving benefit. Making these at home is not just easy; it’s also a great way to save money compared to buying pre-packaged snacks, which can be pricey and loaded with preservatives. Last but not least, let’s not forget that mouthwatering combination of flavors! The chocolate and hazelnuts create a delightful taste explosion that will have you reaching for seconds. If you’re a fan of other homemade snacks, like energy balls, then you’re sure to love these bars as well. So, gather your ingredients, roll up your sleeves, and get ready to create these delicious treats!
How to Make Chocolate Hazelnut Granola Bars
Quick Overview
Creating these delectable Chocolate Hazelnut Granola Bars is a breeze! With a prep time of just 10 minutes and a bake time of around 15 minutes, these bars provide the perfect quick pick-me-up. You’ll be amazed at how simple it is to fusing wholesome oats and crunchy hazelnuts with rich chocolate into a delightful snack that satisfies your cravings.
Key Ingredients for Chocolate Hazelnut Granola Bars
- 2 cups rolled oats
- 1 cup chopped hazelnuts
- 1/2 cup honey or maple syrup
- 1/4 cup coconut oil, melted
- 1 cup chocolate chips (or chunks)
- 1/2 teaspoon vanilla extract
- A pinch of salt
Step-by-Step Instructions
- Preheat the Oven: Preheat your oven to 350°F (175°C) and line an 8×8 inch baking pan with parchment paper for easy removal.
- Mix Dry Ingredients: In a large bowl, combine the rolled oats, chopped hazelnuts, and a pinch of salt. Stir well to ensure everything is evenly mixed.
- Combine Wet Ingredients: In a separate bowl, whisk together the honey (or maple syrup), melted coconut oil, and vanilla extract.
- Combine All Ingredients: Pour the wet mixture over the dry ingredients and stir until everything is well coated. Then gently fold in the chocolate chips.
- Press and Bake: Transfer the mixture to the prepared baking pan, pressing it down firmly into an even layer. Bake in the preheated oven for about 15-20 minutes, or until the edges are lightly golden.
- Cool and Slice: Let the bars cool in the pan for 10 minutes before lifting them out using the parchment paper. Allow them to cool completely on a wire rack before cutting into bars.
Top Tips for Perfecting Chocolate Hazelnut Granola Bars
To ensure your chocolate hazelnut granola bars turn out perfectly every time, keep these tips in mind:
- Use a combination of honey and maple syrup for a sweeter flavor.
- Don’t skip the step of pressing the mixture firmly into the pan; this keeps the bars from cbling.
- Feel free to get creative! You can swap out the hazelnuts for other nuts or even add some dried fruits for a different twist.
Storing and Reheating Tips
To keep your Chocolate Hazelnut Granola Bars fresh, store them in an airtight container at room temperature for up to a week. If you want to extend their life, consider refrigerating them, where they can last up to two weeks. These bars are also great for on-the-go – just grab one and enjoy! If they become a little too firm in the fridge, simply leave them out for a few minutes before enjoying.
Now that you have everything you need, it’s time to experience the joy of making your very own Chocolate Hazelnut Granola Bars! Enjoy the delightful flavors in every bite, and get ready to impress your friends and family with this easy yet indulgent treat.
Chocolate Hazelnut Granola Bars
Ingredients
Method
- Preheat your oven to 350°F (175°C) and line an 8x8 inch baking pan with parchment paper for easy removal.
- In a large bowl, combine the rolled oats, chopped hazelnuts, and a pinch of salt. Stir well to ensure everything is evenly mixed.
- In a separate bowl, whisk together the honey (or maple syrup), melted coconut oil, and vanilla extract.
- Pour the wet mixture over the dry ingredients and stir until everything is well coated. Then gently fold in the chocolate chips.
- Transfer the mixture to the prepared baking pan, pressing it down firmly into an even layer. Bake in the preheated oven for about 15-20 minutes, or until the edges are lightly golden.
- Let the bars cool in the pan for 10 minutes before lifting them out using the parchment paper. Allow them to cool completely on a wire rack before cutting into bars.
Leave a Reply