
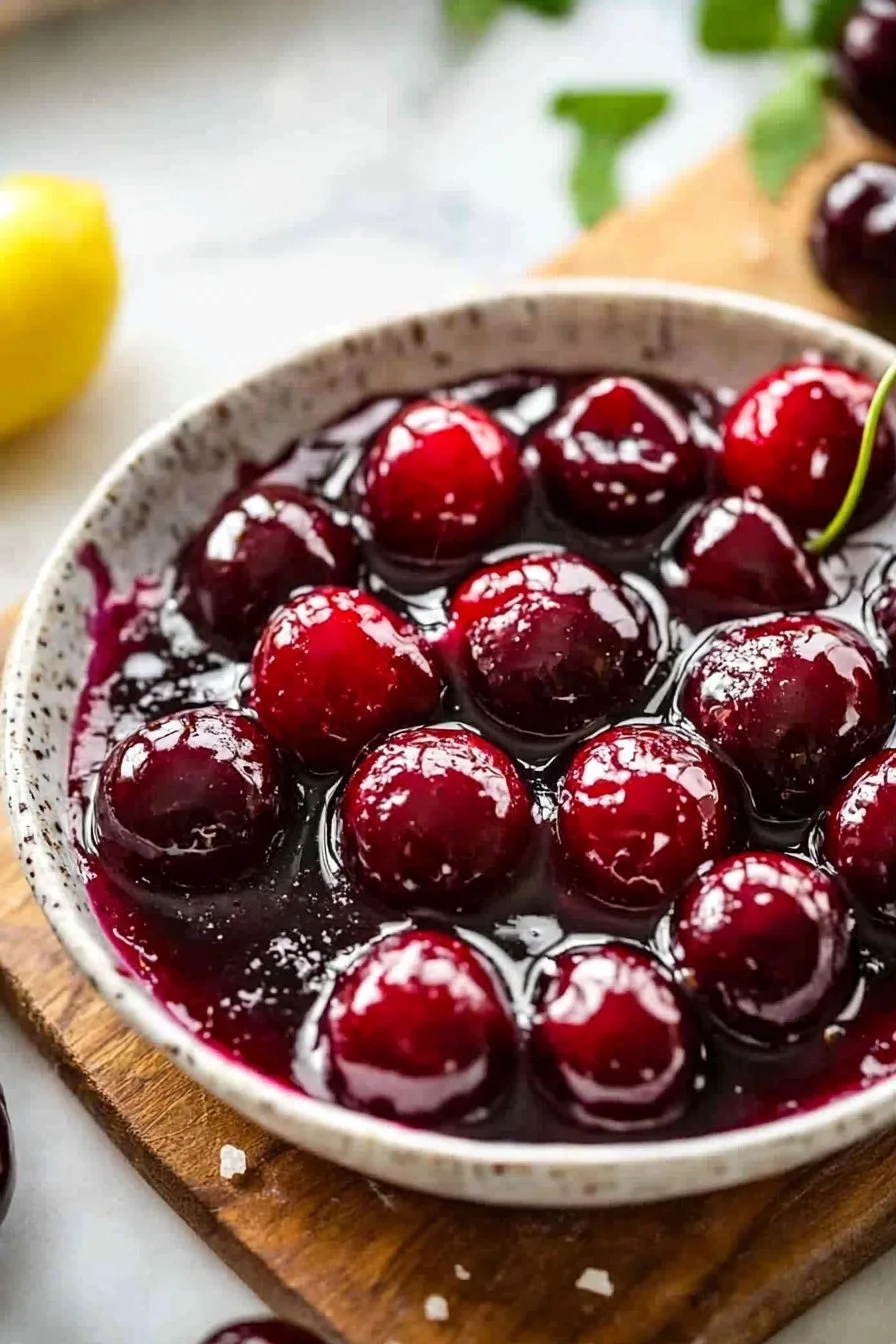
Simple Cherry Pie Filling
There’s something undeniably delightful about the combination of sweet, juicy cherries enveloped in a luscious filling that just melts in your mouth. Creating a Simple Cherry Pie Filling is not only easy but also a wonderful way to bring a touch of summer to your family gatherings any time of the year. With each bite, you experience the burst of flavor that reminds you of warm evenings spent outdoors, indulging in sweet desserts with loved ones.
Did you know that cherry pie is a classic favorite in many cultures? The best part is that this recipe is simple enough for even the novice baker to master. In fact, if you loved our Flaky Pie Crust recipe, you’ll find this Simple Cherry Pie Filling is the perfect complement, making the ultimate dessert pairing. Trust me; it’s both delicious and easy to whip up on a whim—your family will be asking for it again and again!
What is Simple Cherry Pie Filling?
You might wonder why we don’t just call it “cherry filling” and skip the “simple” part. After all, isn’t the goal to create an effortless masterpiece? It turns out that simplicity often leads to the most delicious results! The kind of filling that can make your grandma’s heart swell with pride—and we all know that the way to a man’s heart is through his stomach. So, whether it’s for a cozy winter evening or just because you’re craving something sweet, this Simple Cherry Pie Filling is meant to shine! Why not give it a try? Your loved ones will appreciate the effort, and you’ll enjoy the tasty reward.
Why You’ll Love This Simple Cherry Pie Filling
Imagine walking into your kitchen and being greeted by the scent of sweet cherries mingling with buttery undertones. This Simple Cherry Pie Filling shines as the star of any dessert table, whether served atop a perfectly baked pie crust or as a topping for vanilla ice cream.
One of the best benefits of cooking at home is the cost savings. With just a handful of affordable ingredients, you can create a filling that’s far more flavorful than any store-bought alternative. Plus, the versatility of this cherry filling means you can experiment with toppings! Whether you prefer a scoop of ice cream, a dollop of whipped cream, or a sprinkle of nuts, it’s all delicious. So, put on your apron and let’s dive into making this delightful filling for your next family get-together!
How to Make Simple Cherry Pie Filling
Quick Overview
This Simple Cherry Pie Filling is a joy to prepare, packed with the sweetness of fresh cherries and a hint of almond. It has a beautiful texture, offering a satisfying balance between chewy fruit and smooth syrup. Best of all, it can be ready in just 30 minutes!
Ingredients
- 2 cups fresh cherries, pitted
- 1 cup granulated sugar
- 2 tablespoons cornstarch
- 1 tablespoon lemon juice
- 1 teaspoon vanilla extract
- 1/4 teaspoon almond extract
- 1 tablespoon butter
Step-by-Step Instructions
- Prepare the Cherries: Start by washing and pitting your fresh cherries. You can slice them in half or leave them whole if you prefer.
- Mix Ingredients: In a medium saucepan, combine the fresh cherries, sugar, and cornstarch. Stir until the cherries are well coated with the sugar mixture.
- Add Flavorings: Pour in the lemon juice, vanilla extract, and almond extract. Stir everything together, allowing the flavors to meld beautifully.
- Cook the Mixture: Place the saucepan over medium heat. Stir the mixture continually until it begins to bubble, around 5-7 minutes. The liquid will thicken as it cooks.
- Finish with Butter: Once thickened, remove the saucepan from heat and stir in the tablespoon of butter until melted. This will add a lovely gloss to your filling.
- Cool: Allow the filling to cool for a few minutes before using it in your favorite pie crust, or store it in the refrigerator for later.
Top Tips for Perfecting Simple Cherry Pie Filling
- Substitutions: If you want to explore, try using frozen cherries for convenience. Just let them thaw and drain any excess liquid before mixing.
- Timing: Keep an eye on the mixture; overcooking can turn your cherries mushy. You want a nice bite with a thickened syrup, not fruit soup!
- Avoid Mistakes: Make sure to stir continuously while cooking to prevent the mixture from sticking to the pan.
Storing and Reheating Tips
If you have leftovers (although it may not last long!), store your Simple Cherry Pie Filling in an airtight container in the refrigerator for up to 5 days. You can also freeze it! Just pour the cooled filling into a freezer-safe container, and it will keep for about 3 months.
To reheat, simply warm it in a saucepan over low heat, stirring occasionally until it reaches the desired temperature. This filling is versatile enough to be enjoyed warm or chilled, either alone or as part of a delicious dessert!
Now that you know how to make this Simple Cherry Pie Filling, it’s time to get cooking. Whether you’re making a pie for a family gathering or simply indulging your sweet tooth, this recipe promises a burst of cherry goodness in every bite. Happy baking!

Simple Cherry Pie Filling
Ingredients
Method
- Start by washing and pitting your fresh cherries. You can slice them in half or leave them whole if you prefer.
- In a medium saucepan, combine the fresh cherries, sugar, and cornstarch. Stir until the cherries are well coated with the sugar mixture.
- Pour in the lemon juice, vanilla extract, and almond extract. Stir everything together, allowing the flavors to meld beautifully.
- Place the saucepan over medium heat and stir the mixture continually until it begins to bubble, around 5-7 minutes. The liquid will thicken as it cooks.
- Once thickened, remove the saucepan from heat and stir in the tablespoon of butter until melted, adding a lovely gloss to your filling.
- Allow the filling to cool for a few minutes before using it in your favorite pie crust, or store it in the refrigerator for later.
Leave a Reply