
If you’re longing for a little indulgence that’s as visually striking as it is delicious, then look no further than these decadent Red Velvet Truffles. Imagine a melt-in-your-mouth creamy center, enveloped in a velvety coating of white chocolate—pure bliss! Not to mention, the rich, crimson hue makes them perfect for any family gathering or cozy winter evening. Did you know that red velvet cake actually became popular during the Great Depression due to its simplicity and unique flavor? Just like my No-Bake Cheesecake, this recipe shines in its elegant yet straightforward approach, making it a wonderful option for both novice bakers and seasoned pros.
So, gather your loved ones and prepare to be the star of the kitchen. These truffles are not just a treat; they’re a love letter to anyone who savors a bite of chocolatey goodness.
What are Red Velvet Truffles?
You might be wondering, why the name “red velvet”? Does it have any royal connections? Honestly, the name conjures images of sumptuous fabric and decadent flavors! The origins are a delightful mix of tradition and taste, inspiring the saying, “the way to a man’s heart is through his stomach.” Imagine surprising your family with these luxurious treats, leaving them wondering how you managed to create something so enjoyable in the comfort of your home. Why not put your culinary skills to the test and create a batch of these beautiful truffles? Your loved ones are sure to thank you for it!
Why You’ll Love This Red Velvet Truffles
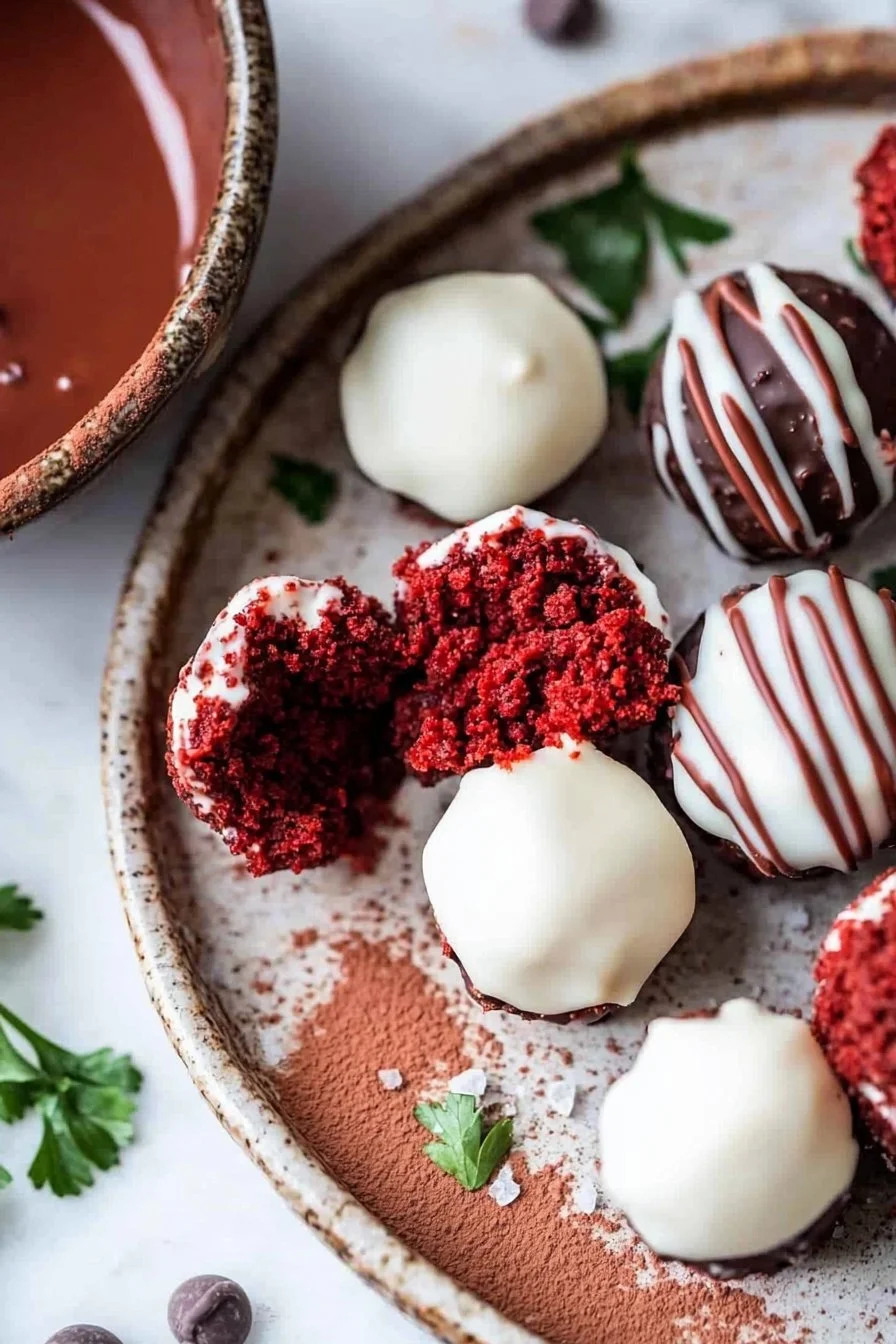
These Red Velvet Truffles are not just a snack; they are an experience! Combining creamy cream cheese frosting with moist red velvet cake crumbs, each truffle packs a flavorful punch that will have you coming back for more. Not only is making these truffles a fantastic way to save some pennies compared to store-bought treats, but you’ll also be the shining star at any gathering.
Plus, the simple flourishes of toppings—like a light dusting of cocoa powder—elevate them from ordinary to extraordinary. If you’ve ever craved the rich flavor of red velvet cake, this truffle-parallels that iconic dessert but in a fun, bite-sized form. So, gather your ingredients, roll up your sleeves, and prepare to delight your taste buds!
How to Make Red Velvet Truffles
Quick Overview
Making Red Velvet Truffles is a breeze, perfect for those who enjoy the satisfaction of creating something delicious without the fuss. With a creamy, dreamy texture and a rich flavor profile, they come together in just about 30 minutes. That’s right—30 minutes to a heavenly indulgence that will dazzle at any family event!
Ingredients
- 1 cup red velvet cake crumbs
- 1/2 cup cream cheese frosting
- 1 cup white chocolate chips
- Cocoa powder (for dusting)
Note: Be sure to use halal-friendly ingredients to keep everything compliant and family-friendly!
Step-by-Step Instructions
- Prepare Cake Crumbs: If you don’t have leftover red velvet cake, bake one according to your recipe, and let it cool completely before crumbling it into fine pieces.
- Mix the Filling: In a large mixing bowl, combine 1 cup of red velvet cake crumbs with 1/2 cup of cream cheese frosting. Mix them well until thoroughly incorporated and a soft dough forms.
- Chill the Mixture: Cover the bowl and place it in the refrigerator for about 15-20 minutes. This will firm up the mixture, making it easier to shape.
- Form the Truffles: Once chilled, use your hands to scoop small portions of the mixture and roll them into bite-sized balls.
- Melt the Chocolate: In a microwave-safe bowl, heat 1 cup of white chocolate chips in 30-second intervals, stirring in between until melted smoothly.
- Coat the Truffles: Dip each red velvet ball into the melted white chocolate, allowing excess chocolate to drip off. Place them on a parchment-lined tray.
- Dust with Cocoa: Before the chocolate hardens, dust the tops with cocoa powder for an elegant finish.
- Chill to Set: Refrigerate the truffles again for about 30 minutes to allow the coating to set firmly.
And just like that, you’ve made Red Velvet Truffles!
Top Tips for Perfecting Red Velvet Truffles
- Ingredient Substitutes: If you can’t find cream cheese frosting, you can make your own using powdered sugar, butter, and cream cheese. Just ensure all ingredients are halal!
- Timing: Make sure your cake is completely cool before crumbling; otherwise, it might become too moist and tricky to roll.
- Common Mistakes: Avoid over-mixing the cake crumbs and frosting. You want to maintain a moist consistency but not create a soggy mixture.
Storing and Reheating Tips
To keep your Red Velvet Truffles fresh and tasty, store them in an airtight container in the refrigerator. They can last up to one week. If you wish to extend their shelf life, you can freeze them for up to three months. Just remember to thaw them in the refrigerator overnight before enjoying them again.
Indulge in these delicious truffles that not only burst with rich flavors but also embody the spirit of family gatherings! Whether you’re snacking during a cozy evening or sharing them with friends, these treats will leave everyone wanting more. Happy baking!
Frequently Asked Questions (FAQ)
- Can I use dark chocolate instead of white chocolate?
Absolutely! Dark chocolate will give your truffles a more robust flavor, and it’s a delightful twist! - What else can I use to coat the truffles?
Besides cocoa powder, you can also coat them with chopped nuts, sprinkles, or even coconut flakes for additional texture and flair! - Can I make these truffles ahead of time?
Yes! They can be made a few days in advance. Just store them properly in the refrigerator or freezer to maintain freshness.
Unleash your inner baker and enjoy these Red Velvet Truffles—a delightful treat just waiting to be devoured!

Red Velvet Truffles
Ingredients
Method
- Prepare Cake Crumbs: If you don’t have leftover red velvet cake, bake one according to your recipe and let it cool completely before crumbling it into fine pieces.
- Mix the Filling: In a large mixing bowl, combine 1 cup of red velvet cake crumbs with 1/2 cup of cream cheese frosting. Mix them well until thoroughly incorporated and a soft dough forms.
- Chill the Mixture: Cover the bowl and place it in the refrigerator for about 15-20 minutes. This will firm up the mixture, making it easier to shape.
- Form the Truffles: Once chilled, use your hands to scoop small portions of the mixture and roll them into bite-sized balls.
- Melt the Chocolate: In a microwave-safe bowl, heat 1 cup of white chocolate chips in 30-second intervals, stirring in between until melted smoothly.
- Coat the Truffles: Dip each red velvet ball into the melted white chocolate, allowing excess chocolate to drip off. Place them on a parchment-lined tray.
- Dust with Cocoa: Before the chocolate hardens, dust the tops with cocoa powder for an elegant finish.
- Chill to Set: Refrigerate the truffles again for about 30 minutes to allow the coating to set firmly.
Leave a Reply