
Picture this: a luscious, creamy peanut butter filling nestled between rich chocolate wafers, just waiting to be devoured on a cozy family gathering evening. The texture is smooth, the flavors are rich, and the satisfaction is instant! Peanut Butter Icebox Cake is one of those desserts that turns simple ingredients into something monumental. It’s an effortless no-bake treat that everyone will love, making it a perfect option for those who prefer to enjoy quality time with loved ones instead of slaving away in the kitchen.
In my early days of blogging, I stumbled upon a similar dessert that required a lengthy baking process that I swiftly forgot about after trying this no-bake version. Trust me when I say, this Peanut Butter Icebox Cake will be the star of your dessert table. Ideal for casual get-togethers or even just a special treat, it’s sure to make everyone’s taste buds sing!
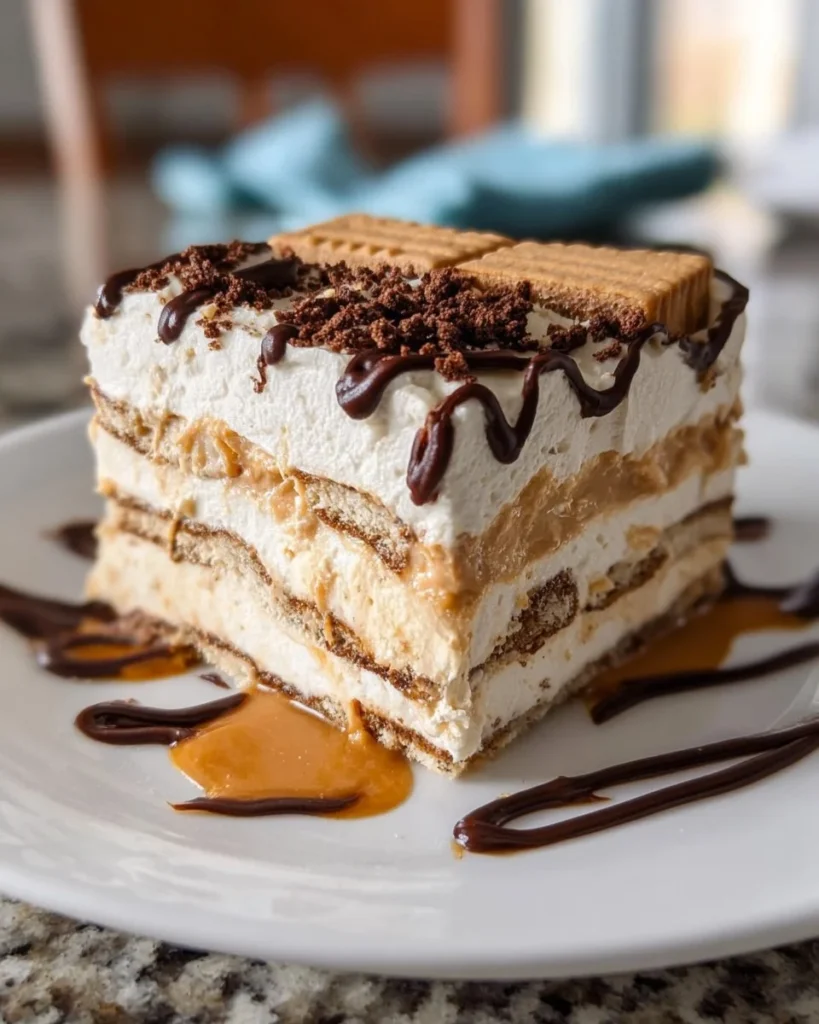
What is Peanut Butter Icebox Cake?
So, what’s in a name? Peanut Butter Icebox Cake sounds delightfully complex, but in reality, it’s deceptively simple! Isn’t it funny how a name can sound fancy but is really just another way to say “delicious layers of happiness”? The origins of this delightful dessert date back to the time when iceboxes were common household items instead of fancy refrigerators, making it a cherished classic throughout the years. And let’s be honest; the way to a man’s heart is through his stomach, and this cake certainly delivers! If you’re looking for a dessert that’s bound to impress, grab your ingredients and let’s create some peanut butter magic together!
Why You’ll Love This Peanut Butter Icebox Cake
You’ll adore Peanut Butter Icebox Cake for countless reasons, but let’s focus on three key highlights. First, its main dish quality shines through boasting a creamy, nutty taste that would make even the pickiest eaters come back for more. Furthermore, it’s one of the most cost-effective desserts you can whip up—no complex tools or techniques needed! Lastly, the array of flavorful toppings you can add will make your cake stand out. Picture drizzling rich chocolate sauce or tossing on some crushed nuts for an extra crunch—yum! If you’re a fan of the classic chocolate and peanut butter combination, think of this as a simplified and cooler version of a peanut butter cup.
How to Make Peanut Butter Icebox Cake
Quick Overview
Making Peanut Butter Icebox Cake is refreshingly straightforward! With a total preparation time of about 30 minutes, you’ll be indulging in a creamy, layered dessert in no time. The texture is creamy, while the chocolate wafers add the perfect crunch—a true feast for both the eyes and the palate!
Ingredients for Peanut Butter Icebox Cake
- 1 cup creamy peanut butter
- 1 cup powdered sugar
- 1 cup heavy cream
- 1 teaspoon vanilla extract
- 1 package (9 oz) chocolate wafer cookies
- 1 cup milk
Step-by-Step Instructions
- Prepare the Peanut Butter Filling: In a medium-sized mixing bowl, combine the creamy peanut butter and powdered sugar. Mix until well blended.
- Whip the Cream: In another bowl, pour the heavy cream and vanilla extract. Use a whisk or electric mixer to whip until soft peaks form.
- Combine: Gently fold the whipped cream into the peanut butter mixture until just combined. Be careful not to over-mix; you want to maintain that light, airy texture.
- Create Layers: Begin layering your icebox cake. Dip each chocolate wafer cookie quickly into the milk, ensuring they are coated but not overly soggy. Place a layer of these cookies at the bottom of your serving dish.
- Add the Filling: Spread a layer of the peanut butter filling over the first layer of cookies. Repeat the process, alternating layers of cookies and peanut butter filling until you reach the top.
- Chill: Cover the dish with plastic wrap and refrigerate for at least 4 hours, or overnight for the best results.
- Serve: Once set, cut into slices, and if desired, top with additional whipped cream or chocolate drizzle before serving.
Top Tips for Perfecting Peanut Butter Icebox Cake
- Substitutions: You can swap creamy peanut butter for crunchy if you love that extra texture. Also, opt for sugar substitutes if diabetic-friendly alternatives are preferred.
- Timing: Allow the cake to set overnight for improved flavor and texture.
- Avoiding Common Mistakes: Be sure to mix gently when combining the whipped cream with the peanut butter mixture to avoid deflating the cream.
Storing and Reheating Tips
Your Peanut Butter Icebox Cake can be kept in the refrigerator for up to 5 days. Make sure to cover it to prevent it from absorbing other odors. If you’re looking to store it for longer, it can be frozen for up to 2 months. Just remember to thaw it in the fridge for a few hours before enjoying it again. The last thing you want is a soggy dessert that loses its indulgent flavors!
FAQ

Whether you’re a seasoned chef or a kitchen novice, this Peanut Butter Icebox Cake is an easy, delightful addition to your recipe repertoire. Share the joy of this rich, creamy dessert with your family and friends, and bask in the praise as they take their first delightful bites. Trust me; you’ll be making this dessert time and again!
Peanut Butter Icebox Cake
Ingredients
Method
- In a medium bowl, combine creamy peanut butter and powdered sugar until well mixed.
- In another bowl, whip heavy cream with vanilla extract until soft peaks form.
- Gently fold the whipped cream into the peanut butter mixture until just combined.
- Dip chocolate wafer cookies in milk quickly, then layer them at the bottom of the serving dish.
- Spread a layer of the peanut butter filling over the cookies.
- Repeat the process, alternating layers of cookies and filling until all is used.
- Cover the dish with plastic wrap and refrigerate for at least 4 hours or overnight for best results.
- Once set, cut into slices and top with additional whipped cream or chocolate drizzle if desired.
Leave a Reply