
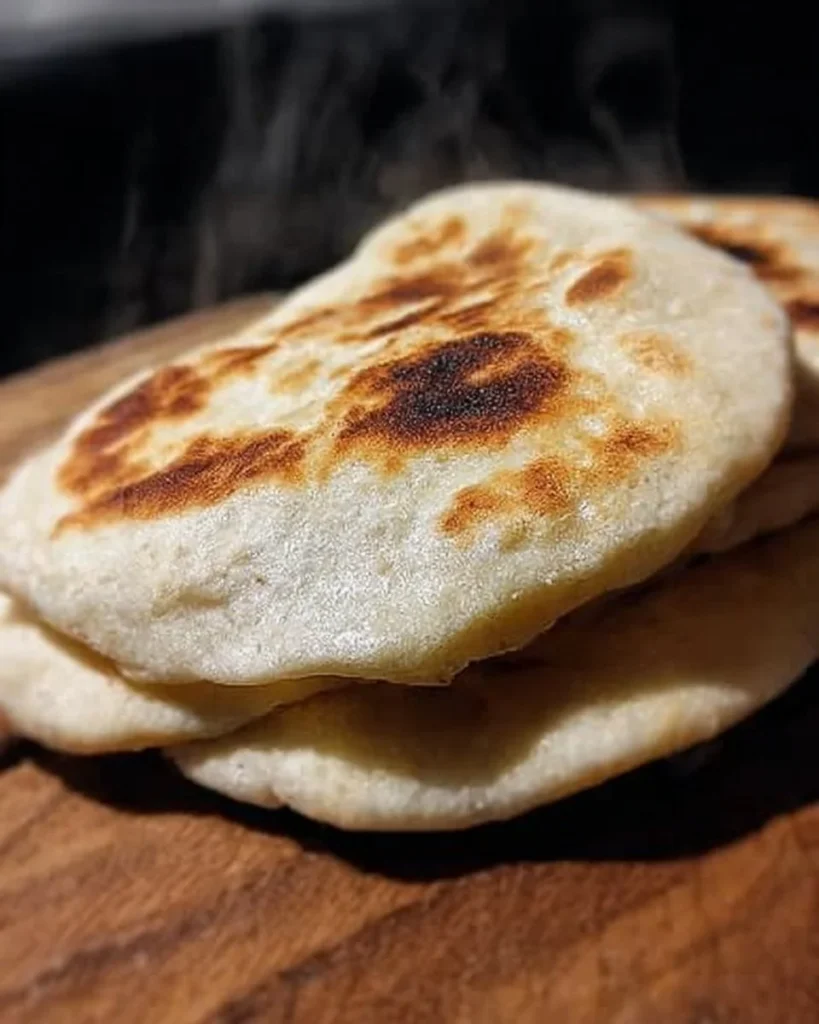
There’s nothing quite like the warm, pillowy embrace of freshly made pita bread, its subtle flavor catching the light with a delicious sheen. This delightful bread, perfect for dipping, wrapping, or simply enjoying on its own, turns any meal into a family feast. Did you know that pita bread dates back to ancient times? It has traveled across regions and cultures, bringing people together over shared meals. There’s a certain magic in pulling apart a pocket of pita, enticingly warm, filling it with roasted veggies, grilled chicken, or your favorite dips. Making your own pita is not only easy but also a rewarding experience that fills your kitchen with mouthwatering aromas.
If you’ve tried store-bought pita before, you know it can be hit or miss. But trust me, once you taste this homemade version, you’ll understand why it’s a culinary treasure, much like my popular homemade hummus recipe that often accompanies it. Let’s roll up our sleeves and dive into this flavorful adventure together!
What is Homemade Pita Bread?
Homemade pita bread might just be one of the happiest kitchen experiments you’ll ever embark on. Ever wondered how the name “pita” came to be? It’s quite a fun mystery! Legend has it that the way to a man’s heart is through his stomach—a sentiment perfectly captured in this fluffy bread that fills your life (and belly!) with love and flavor. As you watch your dough rise, you’re crafting a little piece of joy that brings friends and families together. So why not make some today? Once you taste a warm piece straight from the oven, you won’t want to go back to store-bought options!
Why You’ll Love This Homemade Pita Bread
Pita bread is the unsung hero of the dining table, serving as a main dish that can elevate any meal. Imagine biting into a soft pocket filled with flavorful shawarma or a vibrant salad bursting with colors and tastes. While dining out can be delightful, making your own homemade pita bread is not just cost-effective; it also lets you customize the flavors and ingredients. Not to mention the incredible aroma wafting through your kitchen!
Unlike a heavy store-bought loaf that can weigh down your meal, homemade pita is light and fluffy, making it the perfect companion for a spicy dip. So, gather your family, roll up those sleeves, and let’s make some delicious homemade pita bread!
How to Make Homemade Pita Bread
Quick Overview
Making homemade pita bread is one of those satisfying experiences that is both easy and fulfilling. With its soft texture and mildly nutty flavor, it’s a wonderful bread that’s great for any occasion. From preparation to baking, this delightful recipe will take you about an hour, but trust me, the results are well worth the wait!
Ingredients
- 2 cups all-purpose flour
- 1 teaspoon salt
- 1 teaspoon sugar
- 1 tablespoon olive oil
- 1 teaspoon active dry yeast
- 3/4 cup warm water
Step-by-Step Instructions
- Activate the Yeast: In a small bowl, combine warm water, sugar, and yeast. Let it sit for about 5-10 minutes until it becomes frothy. This shows the yeast is active and ready to work its magic!
- Mixing the Dough: In a large mixing bowl, add the flour and salt. Make a well in the center and pour in the activated yeast mixture along with the olive oil. Mix with a spoon until it forms a shaggy dough.
- Kneading: Transfer the dough onto a floured surface and knead for about 5-7 minutes until smooth and elastic. It should bounce back when you poke it!
- First Rise: Place the kneaded dough in a lightly greased bowl, cover it with a towel, and let it rise in a warm place for about 1 hour, or until it doubles in size.
- Shaping the Pitas: Once risen, punch the dough down gently and divide it into 8 equal pieces. Roll each piece into a ball and then flatten it out into a circle, about 1/4 inch thick.
- Second Rise: Let the flattened discs rest on a flour-dusted surface for about 30 minutes, covered with a towel.
- Preheat the Oven: While the dough is resting, preheat your oven to 475°F (245°C). Place a baking sheet or pizza stone in the oven to heat up.
- Bake the Pitas: Carefully place the pitas on the hot baking sheet. Bake them for about 5-7 minutes, or until they puff up and get a lovely golden color. Watch them closely as they cook!
- Cool and Enjoy: Remove from the oven and cover with a clean towel to keep them soft. Enjoy them fresh, or allow them to cool completely before storing.
Top Tips for Perfecting Homemade Pita Bread
- Flour Type: You can use whole wheat flour for a healthier option, but start with all-purpose flour if you’re a beginner.
- Correct Temperature: Ensure that the water is warm but not hot; you don’t want to kill the yeast!
- Resting Time: Don’t rush the rising time! This is crucial for developing texture and flavor.
- Avoiding Pita Flops: Ensure your oven is fully preheated before baking to achieve that perfect puff.
- Experiment with Flavors: Try adding herbs like oregano or spices to the dough for a twist on traditional pita.
Storing and Reheating Tips
Homemade pita bread can be stored in an airtight container at room temperature for up to 3 days. If you want to keep it longer, you can freeze them! Just wrap them tightly in plastic wrap and place them in a freezer-safe bag. They can last up to 3 months in the freezer.
To reheat, simply place a pita in the microwave for about 15-20 seconds or on a skillet over medium heat for a few seconds on each side. This keeps them soft and delicious, ready to fill with your favorite toppings!

So there you have it—your guide to making the perfect homemade pita bread! Whether you’re gathering for family meals or enjoying a quiet evening, this recipe will surely elevate your culinary journey. Happy baking!
Homemade Pita Bread
Ingredients
Method
- Activate the yeast by combining warm water, sugar, and yeast in a small bowl. Let it sit for 5-10 minutes until frothy.
- In a large mixing bowl, add flour and salt. Make a well in the center, pour in the activated yeast mixture along with olive oil, and mix until a shaggy dough forms.
- Transfer the dough to a floured surface and knead for about 5-7 minutes until the dough is smooth and elastic.
- Place the dough in a greased bowl, cover with a towel, and let it rise in a warm place for about 1 hour or until doubled in size.
- Once risen, punch the dough down gently and divide into 8 pieces. Roll each into a ball and flatten into a circle about 1/4 inch thick.
- Let the flattened discs rest on a flour-dusted surface for about 30 minutes, covered with a towel.
- Preheat the oven to 475°F (245°C) and place a baking sheet or pizza stone inside to heat up.
- Bake the pitas for about 5-7 minutes until they puff up and turn golden. Watch closely while baking.
- Remove from oven and cover with a clean towel to keep them soft.
- Store homemade pita in an airtight container at room temperature for up to 3 days or freeze for up to 3 months.
- To reheat, microwave for 15-20 seconds or warm in a skillet over medium heat for a few seconds on each side.
Leave a Reply