
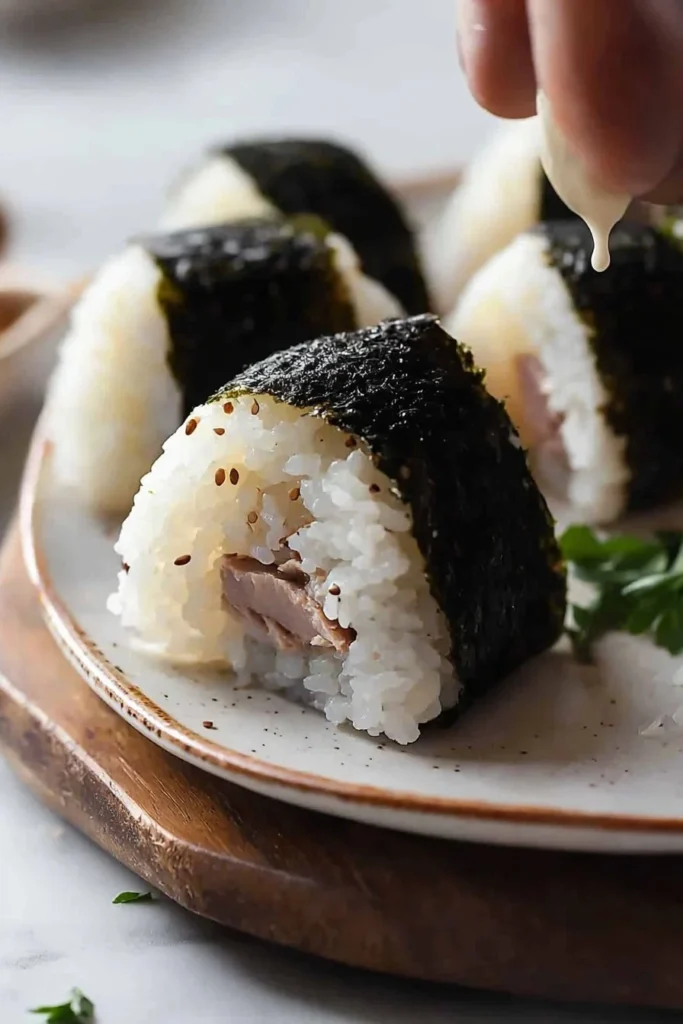
Easy Japanese Tuna Rice Balls
Have you ever craved a snack that perfectly balances simplicity and satisfaction? Look no further than Easy Japanese Tuna Rice Balls! These delightful, hand-rolled bites capture the essence of Japanese cuisine with their tender sushi rice paired with savory tuna, making them incredibly indulgent yet easy to prepare at home. Fun fact: Did you know that these rice balls, or onigiri, are often shaped into triangles, symbolizing the sacred mountains in Japanese culture? They’re perfect for family gatherings or those cozy winter evenings when you want something hearty and comforting. If you love my Spicy Chickpea Patties, you’ll find this recipe equally soothing and soul-satisfying. Let’s dive into the recipe and discover why these little wonders are a must-have!
What is Easy Japanese Tuna Rice Balls?
So, what exactly are Easy Japanese Tuna Rice Balls? Well, imagine a ball of fluffy sushi rice enveloping a luscious mix of tuna and creamy mayonnaise. One might ask, “Why are they called rice balls? Aren’t they more like rice triangles?” The truth is, they can be any shape you fancy! And it’s often said that “the way to a man’s heart is through his stomach,” so what better way to win someone over than with these irresistible bites? Ready to give it a try? Grab your apron, and let’s get rolling!
Why You’ll Love This Easy Japanese Tuna Rice Balls
There’s something undeniably satisfying about sinking your teeth into Easy Japanese Tuna Rice Balls. Firstly, they serve as a fantastic main dish highlight that can easily please a crowd. Preparing your meals at home not only saves your wallet but also lets you customize each rice ball to accommodate various tastes. On top of that, the flavor profile is simply divine! With toppings such as crispy nori and a sprinkle of salt, they delight your taste buds with a wonderful contrast of textures. If you enjoy making things from scratch, you’ll find this dish as simple and rewarding as making fresh pasta. So, are you ready to impress your family and friends?
How to Make Easy Japanese Tuna Rice Balls
Quick Overview
Preparing Easy Japanese Tuna Rice Balls is a breeze! With just a few simple ingredients and minimal time in the kitchen (about 30 minutes), you can craft this delicious dish. These rice balls are soft and fluffy on the outside, while the savory tuna filling offers a rich and satisfying bite. Let’s get started!
Ingredients
- 2 cups sushi rice
- 2 ½ cups water
- 1 can tuna (drained and flaked)
- 2 tablespoons mayonnaise
- 1 teaspoon soy sauce
- Nori (seaweed sheets)
- Salt to taste
Step-by-Step Instructions
- Prepare the Sushi Rice: Rinse 2 cups of sushi rice under cold water until the water runs clear. This helps remove excess starch, resulting in better texture. Add the rice and 2 ½ cups of water to a rice cooker or pot. If using a pot, bring to a boil and then simmer on low, covered, for about 20 minutes or until water is fully absorbed.
- Mix the Tuna Filling: While the rice is cooking, drain your can of tuna and flake it into a mixing bowl. Add 2 tablespoons of mayonnaise, 1 teaspoon of soy sauce, and a pinch of salt. Mix thoroughly until well combined.
- Form the Rice Balls: Once the rice has finished cooking, let it cool slightly but remain warm. Moisten your hands to prevent sticking, and grab a handful of rice (approximately ¾ cup). Create a small indentation in the center and place a spoonful of the tuna mixture inside, then mold the rice around it into a ball or triangle shape.
- Wrap with Nori: Take a sheet of nori and cut it into strips if necessary. Wrap around your rice ball once or twice, securing it in place.
- Repeat: Continue forming the remaining rice balls until all the rice and filling are used up.
- Serve: Enjoy your Easy Japanese Tuna Rice Balls immediately or cool them to room temperature for later!
Top Tips for Perfecting Easy Japanese Tuna Rice Balls
- Substitutions: If you’d like to make this dish halal-friendly or cater to vegetarian tastes, consider substituting tuna with chickpeas or mashed avocado for a unique twist that’s just as delicious!
- Timing: Getting the rice texture just right is crucial. If the rice is too wet, your rice balls might fall apart. Make sure to follow the water ratios closely.
- Avoid Common Mistakes: To prevent your rice balls from sticking together, always keep your hands damp while shaping!
Storing and Reheating Tips
If you have leftovers, you’re in luck! Easy Japanese Tuna Rice Balls can be stored in the refrigerator for up to 3 days. For longer shelf life, freeze them for up to a month. To reheat, simply place them in a microwave-safe dish and heat for about 30 seconds, or enjoy them cold as a flavorful snack on warmer days. Just remember to wrap any leftover nori separately, as it’s best enjoyed fresh to maintain its crispy texture!
In conclusion, Easy Japanese Tuna Rice Balls are both delightful and convenient, perfect for any meal or snack occasion. Their unique flavors and simple preparation make them irresistible for everyone. So why wait? Gather your ingredients and whip up a batch – your taste buds will thank you!

FAQ
- Can I use regular rice instead of sushi rice?
- While sushi rice is ideal for its sticky texture, you can use other short-grain rice, but the overall texture may differ.
- How can I make these vegetarian?
- Substitute the tuna with ingredients like mashed chickpeas or even cooked edamame for a protein-packed alternative.
- Can I make them ahead of time?
- Yes! Prepare the rice balls beforehand and store them in the fridge or freezer, just follow the storing tips.
Easy Japanese Tuna Rice Balls
Ingredients
Method
- Rinse 2 cups of sushi rice under cold water until the water runs clear. Add the rice and 2 ½ cups of water to a rice cooker or pot. If using a pot, bring to a boil and then simmer on low, covered, for about 20 minutes or until water is fully absorbed.
- While the rice is cooking, drain your can of tuna and flake it into a mixing bowl. Add 2 tablespoons of mayonnaise, 1 teaspoon of soy sauce, and a pinch of salt. Mix thoroughly until well combined.
- Once the rice has finished cooking, let it cool slightly but remain warm. Moisten your hands to prevent sticking, and grab a handful of rice (approximately ¾ cup). Create a small indentation in the center and place a spoonful of the tuna mixture inside, then mold the rice around it into a ball or triangle shape.
- Take a sheet of nori and wrap it around your rice ball once or twice, securing it in place.
- Continue forming the remaining rice balls until all the rice and filling are used up.
- Enjoy your Easy Japanese Tuna Rice Balls immediately or cool them to room temperature for later!
Leave a Reply