
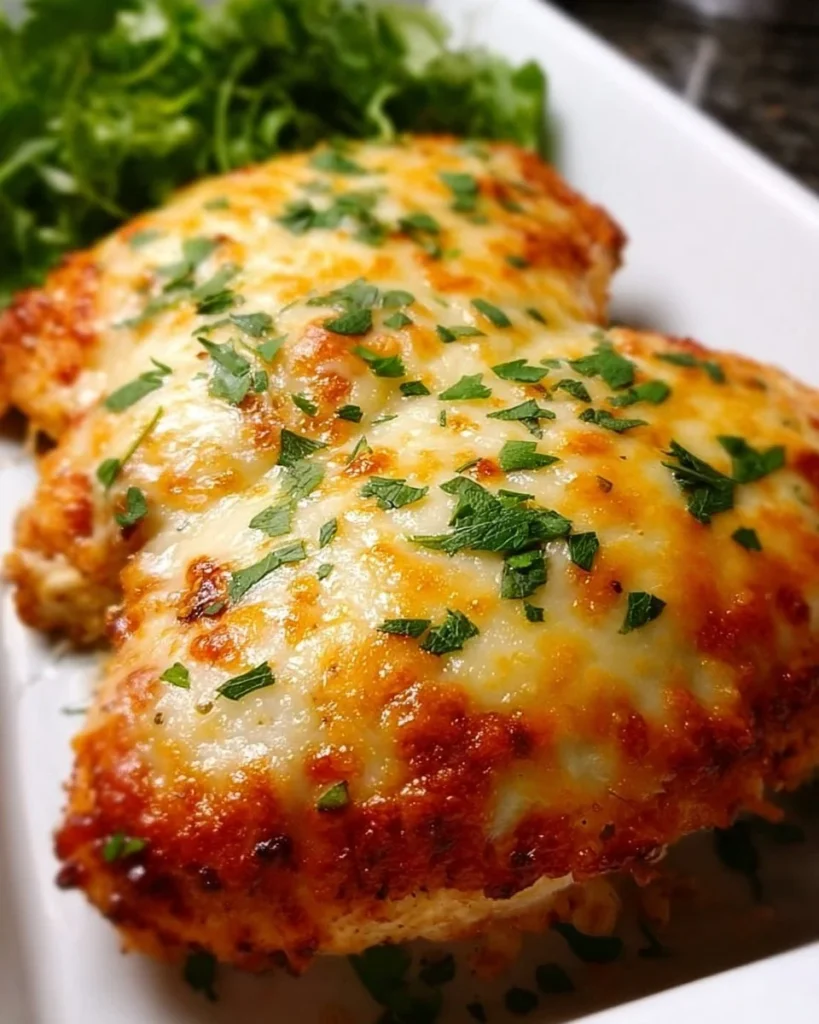
When it comes to weeknight dinners, few dishes can compete with the savory delight of Baked Chicken with Cheese. Imagine succulent chicken breasts, tender and juicy, smothered in a gooey layer of melty cheese and a crispy breadcrumb topping. What’s not to love? This dish doesn’t just fill your stomach; it warms your heart and brings the family together. I remember the first time I made this for my family. The smiles as they dug in were priceless! Similar to my popular recipe for Creamy Garlic Chicken, this dish is comforting yet uncomplicated, making it perfect for busy weeknights or family gatherings. So, roll up your sleeves and let’s dive into this cheesy goodness!
What is Baked Chicken with Cheese?
Ah, Baked Chicken with Cheese! A name that tells you exactly what you’re in for—a mouthwatering experience that satisfies every cheese lover’s dream. But have you ever wondered who first thought, “Let’s bake chicken and cover it in cheese”? It sounds like a culinary fairy tale waiting to be told! It’s said that ‘the way to a man’s heart is through his stomach,’ and after one bite of this cheesy wonder, you’ll find that to be undeniably true. Ready to impress your loved ones? Let’s cook!
Why You’ll Love This Baked Chicken with Cheese
If you’re looking for a main dish that’s as easy to prepare as it is delicious, Baked Chicken with Cheese is your go-to option. Not only does it highlight the wonderful textures of juicy chicken and rich cheese, but it also offers you a chance to save a few dollars by cooking at home. Nothing beats the satisfaction of a homemade meal, especially when you can indulge in a crowd-pleaser like this.
The flavorful toppings—like a crunchy combination of breadcrumbs and cheese—add an irresistible contrast to every bite, taking it to the next level. Imagine this dish alongside a side of roasted vegetables or a fresh salad, and you have a well-rounded, flavorful meal that’s hard to resist. So what are you waiting for? Let’s make the magic happen in your kitchen!
How to Make Baked Chicken with Cheese
Quick Overview
Baked Chicken with Cheese is surprisingly easy to whip up, making it a fantastic choice for novice cooks and busy families alike. With chicken breasts that remain juicy and cheese that becomes gooey and delightful under the heat, every meal feels gourmet. Preparation takes just 10 minutes, and in mere hours, you’ll have a tasty dish ready to impress.
Ingredients for Baked Chicken with Cheese
To create this amazing dish, gather the following ingredients:
- 4 chicken breasts
- 1 cup shredded cheese (cheddar, mozzarella, or your choice)
- 1 cup breadcrumbs
- 1/2 cup grated Parmesan cheese
- 1 teaspoon garlic powder
- 1 teaspoon paprika
- Salt and pepper to taste
- 2 tablespoons olive oil
Step-by-Step Instructions
- Preheat Your Oven: Start by preheating your oven to 375°F (190°C). This ensures even cooking for your chicken.
- Prepare the Chicken: Place the chicken breasts on a clean cutting board. You may wish to pound them slightly for even cooking. Season generously with salt, pepper, garlic powder, and paprika.
- Create the Coating: In a large bowl, mix the breadcrumbs, Parmesan cheese, and a pinch of salt and pepper. This combination will add texture when baked.
- Coat the Chicken: Drizzle the olive oil over the chicken, then cover each piece with the breadcrumb mixture. Make sure that each piece is well-coated for maximum crunch and flavor.
- Bake: Arrange the coated chicken breasts on a baking sheet lined with parchment paper. Bake in the preheated oven for 20-25 minutes. About five minutes before the cooking time is up, sprinkle the shredded cheese over the chicken.
- Finishing Touches: Once the cheese is melted and bubbly, remove the chicken from the oven and let it rest for a few minutes. This will help retain juiciness!
- Serve and Enjoy: Cut into the chicken and watch as the melty cheese oozes out. Serve warm and delight in the smiles at your dinner table.
Top Tips for Perfecting Baked Chicken with Cheese
- Substitutions: If you prefer turkey or another compliant chicken alternative, feel free to make the switch. Just adjust the cooking time according to thickness.
- Check the Timing: Make sure not to overbake; keep an eye on the chicken as ovens vary. A meat thermometer inserted into the thickest part should read 165°F (75°C) to ensure it’s fully cooked.
- Avoiding Mistakes: Coat the chicken evenly with the breadcrumb mixture to achieve that perfect golden crust. If you have leftovers, skip the microwave. Instead, reheat in the oven to preserve that delightful texture.
Storing and Reheating Tips
If you happen to have leftovers of your Baked Chicken with Cheese, you’re in luck! Store them in an airtight container in the refrigerator, where they’ll stay fresh for up to 3 days. If you’d like to keep them longer, consider freezing. They will maintain their quality for up to three months in the freezer.
To reheat, place the chicken back in the oven at 350°F (175°C) for about 15-20 minutes, or until heated through. This method will help keep that crispy topping intact while warming the chicken back up.

This recipe for Baked Chicken with Cheese is not just a meal; it’s an experience! Perfect for family gatherings or cozy evenings at home, it’s sure to become a new favorite in your household. Ready to experience this cheesy delight for yourself? Gather your ingredients and let’s get started on making delicious memories!
Baked Chicken with Cheese
Ingredients
Method
- Preheat your oven to 375°F (190°C).
- Place the chicken breasts on a clean cutting board. Optionally pound them for even cooking. Season with salt, pepper, garlic powder, and paprika.
- In a large bowl, mix the breadcrumbs, Parmesan cheese, and a pinch of salt and pepper.
- Drizzle olive oil over the chicken, then coat each piece with the breadcrumb mixture.
- Arrange the coated chicken breasts on a baking sheet lined with parchment paper.
- Bake in the preheated oven for 20-25 minutes. About 5 minutes before finishing, sprinkle the shredded cheese over the chicken.
- Once the cheese is melted and bubbly, remove from the oven and let it rest for a few minutes before serving.
Leave a Reply