
When it comes to desserts that offer a delightful combination of textures and flavors, Raspberry Coconut Magic Bars are truly in a league of their own! Imagine a luscious layer of chewy coconut intertwined with tangy raspberries, all sitting atop a buttery oatmeal crust. This treat is like a slice of paradise, evoking memories of summer picnics and family gatherings. Did you know that coconut is often referred to as the “tree of life” because it provides so many benefits? In a way, these bars embody that essence by bringing people together through their delightful taste and appearance. If you’ve tried my popular Chocolate Chip Cookie Bars, you’re in for a fantastic twist with this recipe. Let’s dive into how you can whip up this deliciously simple dessert that your family will rave about!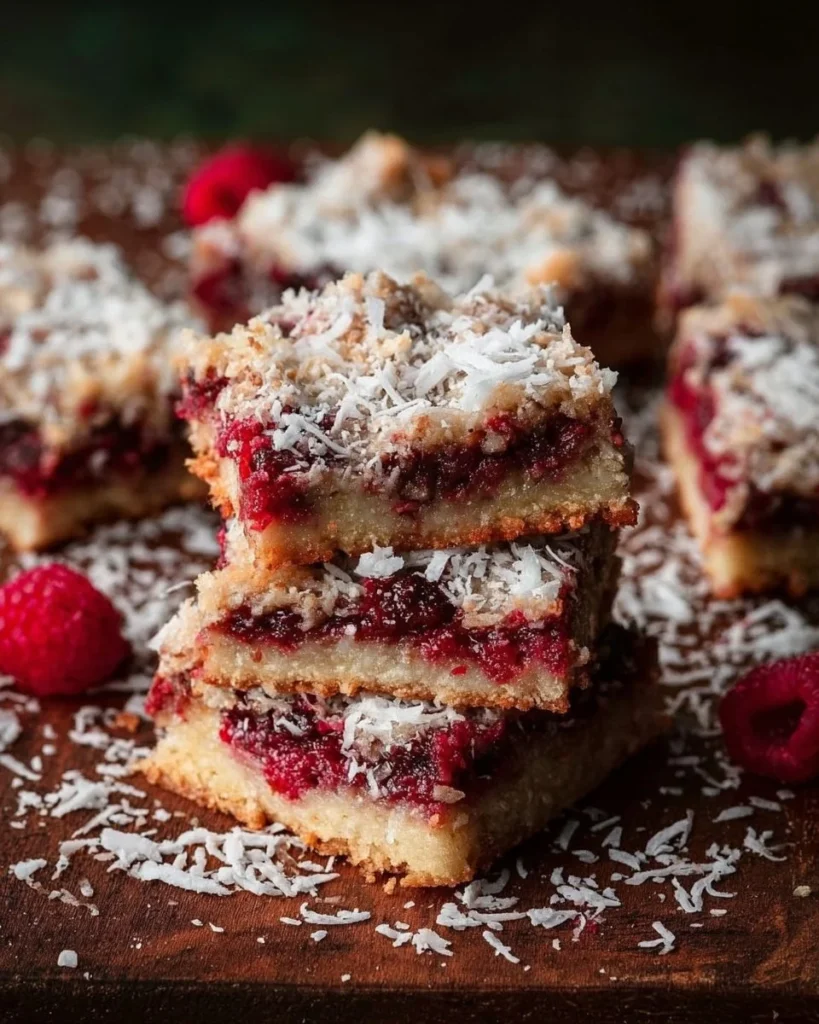
What are Raspberry Coconut Magic Bars?
So, what exactly are Raspberry Coconut Magic Bars? The name might sound like it came from a whimsical cookbook of fairytales, but the truth is they are every bit as magical as they sound. Picture a treat that has enough crunch on the outside to satisfy your craving for something sweet, yet gooey and rich on the inside. It’s like having a taste of sunshine on your winter evenings. And isn’t it true what they say? “The way to a man’s heart is through his stomach.” These bars might just be the solution to win over your loved ones during family gatherings! So, why not grab your apron and get ready to impress?
Why You’ll Love This Raspberry Coconut Magic Bars
First off, let’s talk about what makes these Raspberry Coconut Magic Bars a sure hit. The main dish highlight is undeniably the incredible fusion of sweet raspberries and coconut that creates a mouthwatering experience. Not to mention, making these bars at home is a great way to save money compared to buying pre-made treats at the store. You can easily whip up a large batch for a cozy family gathering without breaking the bank! And don’t be surprised when you start experimenting with toppings; the sweet-and-tart raspberry pairs beautifully with a drizzle of dark chocolate or a sprinkle of crushed nuts sprinkled on top. Just thinking about it is enough to make your taste buds dance! Ready to give this exceptional recipe a try?
How to Make Raspberry Coconut Magic Bars
Quick Overview
Making Raspberry Coconut Magic Bars is not just easy; it’s downright satisfying! In less than an hour, you can have a batch ready to impress your family and friends. The combination of textures—chewy, crunchy, and gooey—meets flavor in a delightful balance that will leave everyone craving more. With a quick prep time of just 15 minutes and a baking time of around 30 minutes, they’re perfect for a last-minute dessert option!
Key Ingredients for Raspberry Coconut Magic Bars
To make these delicious bars, you will need the following ingredients:
- 1 ½ cups rolled oats
- 1 ½ cups all-purpose flour
- 1 cup brown sugar (light or dark)
- ½ cup unsweetened shredded coconut
- ½ cup unsalted butter (melted or coconut oil for a dairy-free option)
- 1 can (14 oz) sweetened condensed milk
- 1 ½ cups fresh raspberries (or frozen, thawed)
- ½ tsp vanilla extract (optional)
- ¼ tsp salt
Step-by-Step Instructions
- Preheat your oven to 350°F (175°C). Line a 9×13-inch baking pan with parchment paper, leaving some overhang to make it easy to lift out later.
- Make the Crust: In a bowl, mix rolled oats, flour, brown sugar, shredded coconut, and salt. Pour in the melted butter (or melted coconut oil) and mix until combined. Press this mixture evenly into the prepared baking pan to form the crust.
- Bake the Crust: Place the crust in the preheated oven and bake for 10-12 minutes or until the edges are slightly golden.
- Add the Layer: Remove the crust from the oven and evenly spread the fresh berries over the top. Drizzle sweetened condensed milk over the raspberries.
- Finish Baking: Return the bars to the oven and bake for an additional 20-25 minutes, until the top is golden and bubbly.
- Cool and Slice: Let the bars cool completely in the pan. Once cooled, lift them out using the overhanging parchment and slice into squares.
Top Tips for Perfecting Raspberry Coconut Magic Bars
- Substitutions: If you want to switch things up, try using almond flour instead of regular flour for a gluten-free version! You can also swap out the raspberries for other berries like blueberries or strawberries.
- Timing: Keep an eye on the bars while they bake! Ovens can vary, so start checking a few minutes before the suggested time.
- Common Mistakes: Avoid using overly ripe berries; they can turn mushy. Instead, choose firm raspberries for the best texture!
Storing and Reheating Tips
To store your Raspberry Coconut Magic Bars, keep them in an airtight container at room temperature for up to 3 days. For longer storage, refrigerate, and they’ll keep well for about a week! You can also freeze them if you want to save for a rainy day. Just wrap the individual bars in plastic wrap, then in foil, and they’ll last for up to 3 months! To reheat, simply place them in a toaster oven for a few minutes, or enjoy them cold for that refreshing burst of flavor.
Now that you have all the tools to create your very own Raspberry Coconut Magic Bars, it’s time to gather your loved ones around and indulge in this delicious treat! Enjoy every gooey, sweet bite!
Raspberry Coconut Magic Bars
Ingredients
Method
- Preheat your oven to 350°F (175°C). Line a 9×13-inch baking pan with parchment paper, leaving some overhang for easy lifting.
- In a bowl, mix rolled oats, flour, brown sugar, shredded coconut, and salt. Pour in the melted butter (or coconut oil) and mix until combined.
- Press this mixture evenly into the prepared baking pan to form the crust.
- Bake the crust for 10-12 minutes or until the edges are slightly golden.
- Remove the crust from the oven and evenly spread the fresh raspberries over the top.
- Drizzle sweetened condensed milk over the raspberries.
- Return the bars to the oven and bake for an additional 20-25 minutes, until the top is golden and bubbly.
- Let the bars cool completely in the pan.
- Once cooled, lift them out using the overhanging parchment and slice into squares.
Leave a Reply