
If you’re on the hunt for a simple, quick, and utterly delicious treat that will satisfy your sweet tooth, look no further than Butterfinger Balls! This no-bake delight combines the limited-time indulgence of creamy peanut butter and crunchy Butterfinger candy in a way that’s completely irresistible. Picture this: rich, savory peanut butter coated in chocolate, topped with the cbled goodness of Butterfinger bars, creating an explosion of flavor in every bite. And believe me, as the family devours these little gems, you’ll hear nothing but approving murmurs around the table!
I stumbled upon this recipe during a baking session one afternoon when I needed a quick fix for my sweet cravings. It’s quickly become a family favorite, often requested for casual gatherings, and any time someone is in the mood for a treat. What makes it even better? It’s incredibly easy to whip up with just a few simple ingredients and hardly any prep time. So grab your aprons—Butterfinger Balls are just too good to resist!
 What are Butterfinger Balls?
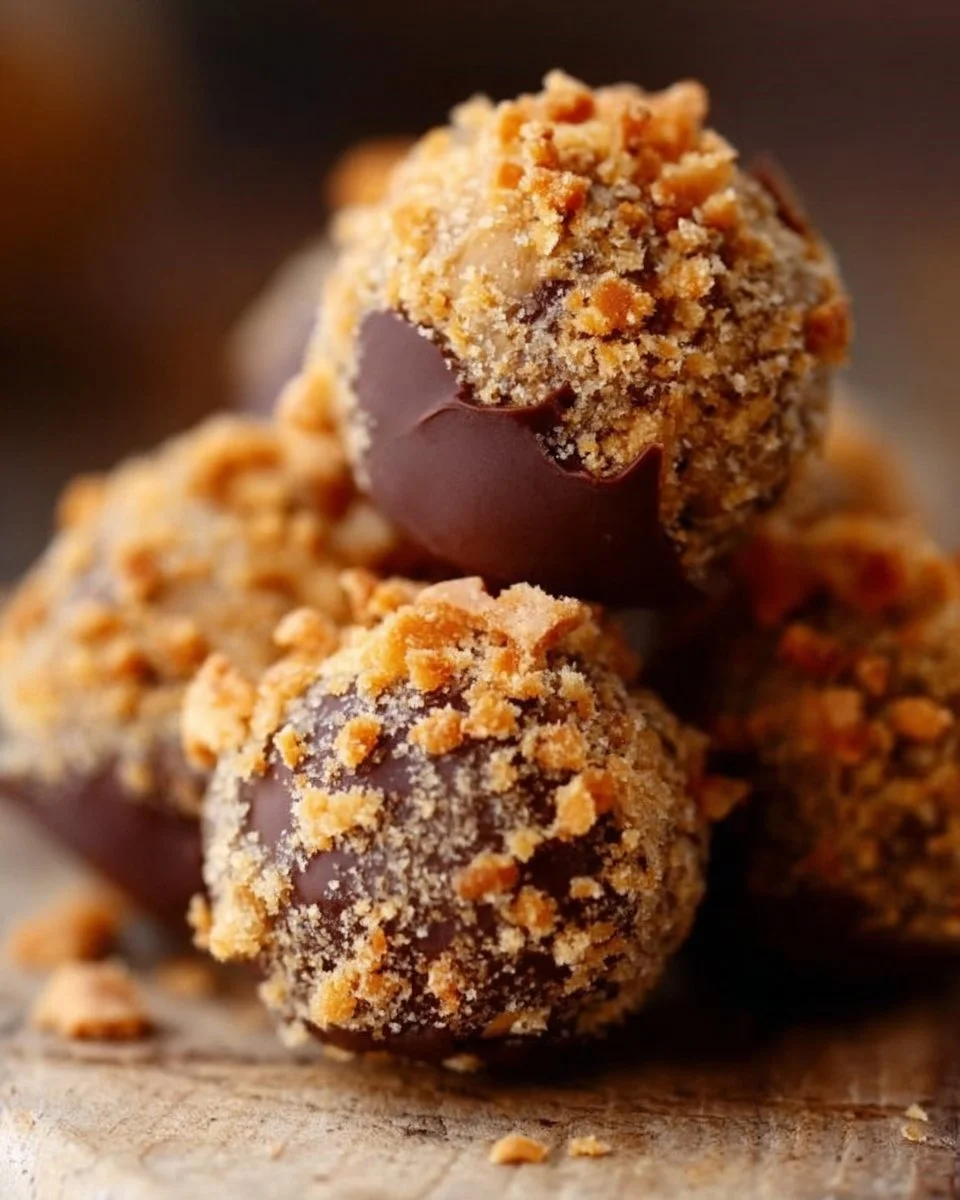
Now, let’s get to the crux of the matter—what exactly are Butterfinger Balls? Imae a blissful combination of peanut butter and chocolate that feels like a party in your mouth. Sounds delightful, doesn’t it? These bites of joy are essentially little round balls made from crushed Butterfinger bars mixed with peanut butter and coated in chocolate. If you’ve ever wondered why this treat is named “Butterfinger,” it was inspired by the famous chocolate bar that features a crunchy, flaky peanut butter center—an ingredient that shines brightly in this recipe! You know what they say, “the way to a man’s heart is through his stomach,” and let me assure you, these little gold nuggets will make everyone feel loved! Give them a try—you won’t regret it!
Why You’ll Love This Recipe!
Butterfinger Balls are undeniably a sweet delight that pack a punch of flavor, and there are three standout reasons you’ll adore them:
- Oh-So-Decadent Taste: The sweet, nutty flavor of peanut butter paired with the crunchiness of Butterfinger creates an explosion of tastes that undeniably harmonize. It’s a treat that appeals to both kids and adults alike, making it a must-try dessert for any occasion.
- Cost-Effective and Homemade: Who doesn’t love making a mouthwatering treat at home without breaking the bank? The ingredients are simple and inexpensive, which means you can whip up a batch without feeling guilty! Plus, they provide a taste that’s far superior to any store-bought alternative.
- Endless Variations: While the orial recipe is divine on its own, you can always switch things up with toppings or add-ins to make them your own! Don’t be afraid to get creative—think about sprinkling sea salt on top or drizzling caramel for an extra burst of flavor.
If you’re a fan of no-bake desserts, you might also want to explore other recipes on the blog like our chocolate-covered rice krispie treats, which share the same easy-to-make appeal. So why not roll up your sleeves and dive into making Butterfinger Balls at home?
How to Make Butterfinger Balls
Quick Overview
These Butterfinger Balls are as simple as they are delicious and can be ready to enjoy in about 30 minutes! With minimal ingredients and no need for baking, you’ll find that creating this sweet treat is as easy as mixing, rolling, and coating. You’ll appreciate the blissful taste that results from such a straightforward preparation.
Key Ingredients for Butterfinger Balls:
To create these delightful treats, you’ll need the following ingredients:
- 1 cup creamy peanut butter
- 1 ½ cups powdered sugar
- 1 cup crushed Butterfinger bars (approximately 3 regular-sized bars)
- 2 cups semi-sweet chocolate chips
- 1 tablespoon of coconut oil (optional for melting chocolate)
Step-by-Step Instructions:
- Combine the Ingredients: In a large mixing bowl, combine the creamy peanut butter and powdered sugar. Mix until well blended and you have a thick, dough-like consistency.
- Add the Crunch: Fold in the crushed Butterfinger bars into the peanut butter mixture until evenly distributed.
- Form the Balls: Using your hands, scoop out small portions of the mixture and roll them into balls about the size of a golf ball. Lay them out on a baking sheet lined with parchment paper.
- Chill: Place the baking sheet in the freezer for about 15-20 minutes, allowing the balls to firm up.
- Melt the Chocolate: While the balls are chilling, melt the semi-sweet chocolate chips in a microwave-safe bowl. If using, add the coconut oil to the chocolate for a smoother consistency. Heat in intervals, stirring each time until fully melted.
- Coat the Balls: Once chilled, remove the peanut butter balls from the freezer. Dip each ball into the melted chocolate, ensuring they are fully coated.
- Decorate (Optional): After dipping, you can sprinkle more crushed Butterfinger on top or drizzle with additional melted chocolate for added flair!
- Set: Place the chocolate-covered balls back onto the lined baking sheet and let them sit until the chocolate hardens.
- Enjoy: Once set, these delicious Butterfinger Balls are ready to eat! Store any leftovers in the refrigerator for later enjoyment.
What to Serve Butterfinger Balls With
Butterfinger Balls make a fantastic standalone dessert, but they can also be complemented with some delicious pairings. Consider serving them alongside a scoop of vanilla ice cream for a delightful contrast of temperatures and textures. Or, you could offer a hot cup of coffee or chocolate milk for a perfect sweet pairing. If you want to give it a festive twist, why not DIY a dessert platter and include other sweet treats like brownies or cookies to share the love?
Top Tips for Perfecting Butterfinger Balls
To make the best Butterfinger Balls possible, here are a few top tips:
- Use Room Temperature Peanut Butter: This ensures a smooth consistency that easily combines with the powdered sugar.
- Try Different Chocolates: If you want a twist on the flavor, experiment with dark chocolate or even white chocolate for a sweeter alternative!
- Avoid Common Mistakes: Be careful not to over-melt the chocolate; let it sit for a minute rather than heating too long to maintain that glossy finish.
Storing and Reheating Tips
Butterfinger Balls can be stored in an airtight container in the refrigerator for up to a week. With such a delicious treat, I doubt they’ll last long, but it’s always good to know! If you want to store them longer, they can also be frozen in a sealed container for up to three months. To bring them back to their tasty state, just let them thaw in the fridge for a few hours. There’s no need for reheating, just dive into these delightful treats straight from the fridge!
With this simple and fun recipe for Quick and Easy Butterfinger Balls, you have the perfect little treat for any occasion. Whether it’s for a weekend family movie night or a fun gathering with friends, these bites are sure to bring smiles and satisfaction! Go ahead, gather your ingredients, and get started on your dessert adventure!

Butterfinger Balls
Ingredients
Method
- In a large mixing bowl, combine the creamy peanut butter and powdered sugar. Mix until well blended and you have a thick, dough-like consistency.
- Fold in the crushed Butterfinger bars into the peanut butter mixture until evenly distributed.
- Using your hands, scoop out small portions of the mixture and roll them into balls about the size of a golf ball. Lay them out on a baking sheet lined with parchment paper.
- Place the baking sheet in the freezer for about 15-20 minutes, allowing the balls to firm up.
- While the balls are chilling, melt the semi-sweet chocolate chips in a microwave-safe bowl. If using, add the coconut oil to the chocolate for a smoother consistency. Heat in intervals, stirring each time until fully melted.
- Once chilled, remove the peanut butter balls from the freezer. Dip each ball into the melted chocolate, ensuring they are fully coated.
- After dipping, sprinkle more crushed Butterfinger on top or drizzle with additional melted chocolate for added flair.
- Place the chocolate-covered balls back onto the lined baking sheet and let them sit until the chocolate hardens.
- Once set, these delicious Butterfinger Balls are ready to eat! Store any leftovers in the refrigerator for later enjoyment.
Leave a Reply