
When it comes to comforting, homemade goodness, few things can beat freshly made roti. This simple yet delightful Indian flatbread is known for its soft, pliable texture and versatility, making it a beloved staple in many households. Picture tender, warm rotis served alongside a rich curry or scooped into a hearty daal – can you resist? This recipe promises to bring the authentic taste of Indian cuisine right into your kitchen, and the best part? It’s incredibly quick to prepare, making it perfect for busy weeknight dinners or relaxing weekend brunches.
Did you know that roti has been a cherished part of Indian dining for centuries? Often made from whole wheat flour, roti is not just a side dish but an essential part of a meal that can elevate your dining experience. It’s a joy to roll out the dough and create these fluffy rounds, all while enjoying the delightful aroma that fills your kitchen. So, are you ready to embark on this culinary adventure? Let’s dive into the world of homemade roti!
 What is Homemade Roti?
Ah, roti! Isn’t it interesting that such a simple name can bring so much warmth and comfort? The term “roti” comes from the Hindi word for bread, and it’s a food that unites people across regions and cultures. Have you ever wondered how something so simple can have so many variations? In India alone, you can find different types of roti, like chapati, phulka, and tandoori rotis, each with its own cooking style and flavor.
But let’s get real – “the way to a man’s heart is through his stomach,” and what better way to win them over than with homemade roti? Soft, warm, and inviting, this flatbread pairs beautifully with almost anything, from spicy curries to tangy pickles. So, roll up your sleeves and get ready to make your new favorite side!
Why You’ll Love This Homemade Roti
There are so many reasons to love homemade roti! First and foremost, the highlight of this dish is its incredible simplicity. With just a few basic ingredients and a fondness for cooking, you can create tender, delicious flatbreads that will wow everyone at the table. Plus, making roti at home is a cost-effective way to enjoy this classic dish without breaking the bank.
The flavor profile of roti is also special; it boasts a warm, nutty taste that complements any main dish beautifully. Whether you’re slathering it with ghee, enjoying it with a flavorful curry, or using it to scoop up ils, each bite is sure to bring joy to your taste buds. And if you enjoy cooking, you’ll find it hard to resist experimenting with various toppings. Feeling adventurous? Try adding a sprinkle of garlic or herbs to the dough for a fantastic twist!
Just think of it as being on par with other comforting recipes like homemade naan. While naan is often leavened and soft, roti offers a different texture and is perfect for quick meals. Dive into this recipe to discover the delightful world of homemade roti!
How to Make Homemade Roti
Quick Overview
Making roti may sound daunting if you’ve never tried it before, but fear not! This dish is easy, delicious, and satisfying, elevating your meals without requiring extensive cooking skills. The entire process takes about 30 minutes from start to finish, making it perfect for both busy weekdays and leisurely weekends. You’ll yield several servings perfect for family and friends; just wait until they smell that warm, toasty aroma wafting through the air!
Key Ingredients for Homemade Roti
- Whole wheat flour – 2 cups, or chapati flour
- Water – 3/4 cup, warm
- Salt – 1/2 teaspoon (optional)
- Ghee or oil – for cooking (optional)
Step-by-Step Instructions:
- Prepare the Dough: In a large mixing bowl, combine the whole wheat flour and salt. Gradually add the warm water while kneading the flour with your hands until a smooth dough forms. The dough should not be sticky; adjust with more flour or water as necessary. Knead for about 5-7 minutes.
- Resting Time: Cover the dough with a damp cloth and let it rest for at least 15-20 minutes. This allows the gluten to relax, resulting in softer rotis.
- Divide the Dough: Once rested, divide the dough into equal-sized balls (about the size of a golf ball). Roll each ball lightly in your palms to create a smooth surface.
- Rolling the Roti: On a lightly floured surface, take one dough ball, flatten it slightly, and roll it out into a thin circle, approximately 6-8 inches in diameter. Aim for even thickness to ensure uniform cooking.
- Cooking the Roti: Preheat a flat skillet or tava over medium-high heat. Place the rolled-out roti on the skillet and cook for about 30 seconds, or until small bubbles start to form. Flip it over, apply a little ghee or oil if desired, and cook for an additional 30 seconds. You might gently press down with a spatula to encourage puffing.
- Repeat: Remove the cooked roti from the skillet and keep it warm in a covered container. Repeat the process for the remaining dough balls, adjusting the heat as necessary.
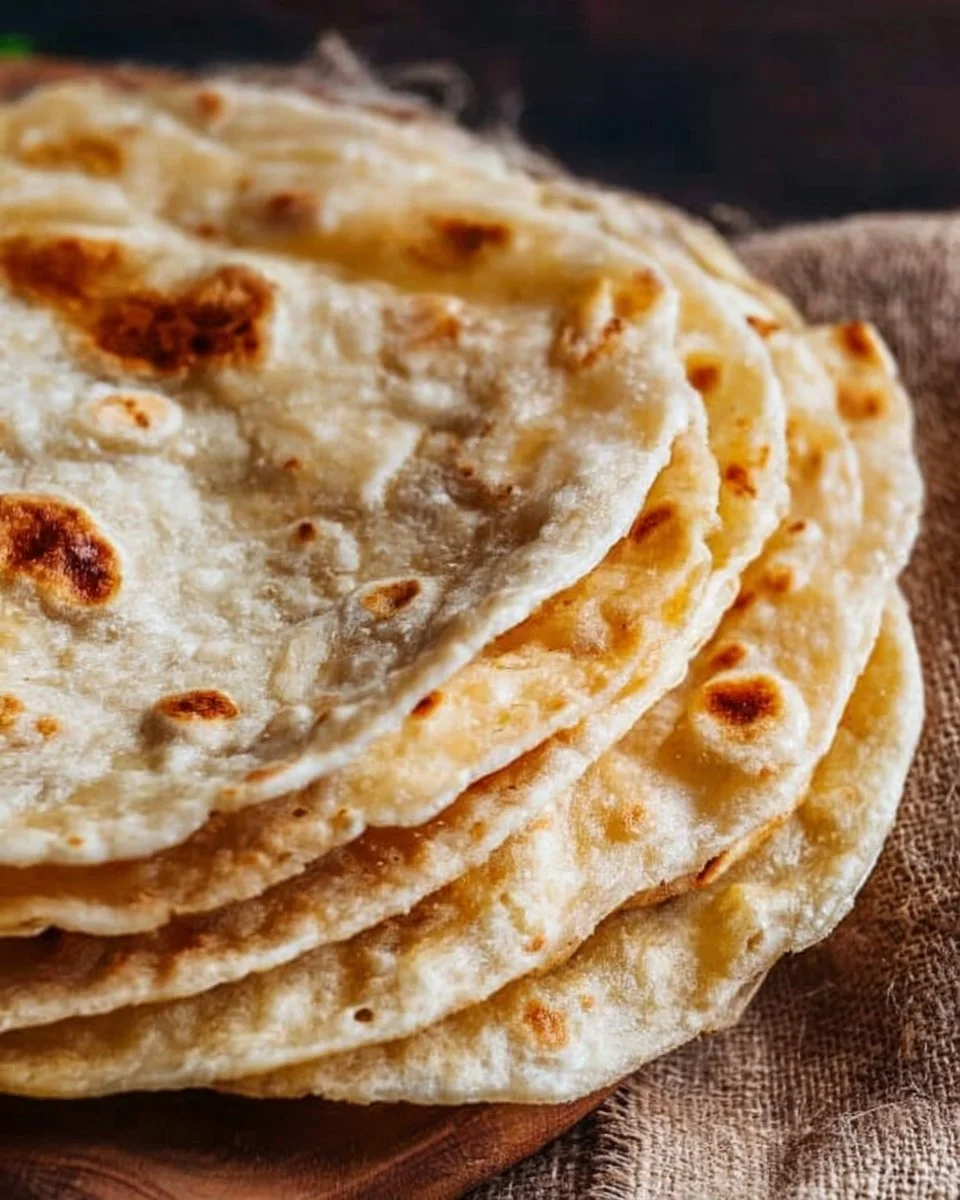
And there you have it—a stack of warm, fluffy roti ready to impress!
What to Serve Homemade Roti With
Homemade roti is your perfect meal companion! It pairs beautifully with a range of dishes, enhancing the flavors and providing a lovely texture to your meal. Consider serving it alongside a spicy chickpea curry, a rich butter chicken, or a fragrant vegetable saag. For a lighter touch, it’s also fantastic with ils or dal, giving you a hearty meal without overwhelming your palate.
Don’t forget juices, smoothies, or yogurt-based drinks like lassi to cool down the palate! Each pairing only amplifies the delightful experience of enjoying homemade roti.
Top Tips for Perfecting Homemade Roti
- Kneading: Properly knead the dough to achieve a smooth and elastic consistency. Don’t rush this step; a well-kneaded dough makes all the difference.
- Resting: Let the dough rest to ensure softer rotis. Patience is key here!
- Rolling Techniques: Aim for an even thickness when rolling to avoid uneven cooking. If you find it challeng, don’t worry—practice makes perfect!
- Cooking Surface: A good-quality skillet or tava will create the best results. Allow it to be hot enough before placing the roti on it to ensure proper puffing.
- Experiment: Feel free to add spices or herbs to your dough for added flavor or try serving with various dips or sides.
Storing and Reheating Tips
After delighting in your homemade roti, you might have some leftovers—if you’re lucky! To extend their lifespan, store any remaining rotis in an airtight container at room temperature if you plan on consuming them within a day or two. For longer storage, refrigerate them for about a week or freeze them for future meals.
To reheat, simply warm the roti in a skillet over low heat for a few minutes, or microwave for about 10-15 seconds. They should regain their tenderness without becoming dry.
With this guide, you’re ready to make your delicious, homemade roti a staple in your cooking routine. So, roll up those sleeves and enjoy the satisfying process of creating something truly special! Happy cooking!

Homemade Roti
Ingredients
Method
- In a large mixing bowl, combine the whole wheat flour and salt.
- Gradually add the warm water while kneading until a smooth, non-sticky dough forms.
- Knead for about 5-7 minutes.
- Cover the dough with a damp cloth and let it rest for at least 15-20 minutes.
- Divide the rested dough into equal-sized balls (about the size of a golf ball). Roll each ball lightly to create a smooth surface.
- On a lightly floured surface, take one dough ball, flatten it slightly, and roll it out into a thin circle, approximately 6-8 inches in diameter.
- Preheat a flat skillet or tava over medium-high heat.
- Cook the rolled-out roti for about 30 seconds, or until small bubbles form.
- Flip it over, apply a little ghee or oil if desired, and cook for an additional 30 seconds.
- Gently press down with a spatula to encourage puffing.
- Remove the cooked roti from the skillet and keep it warm in a covered container.
- Repeat the process for the remaining dough balls, adjusting the heat as necessary.
Leave a Reply